Access other related articles
Creating a Property
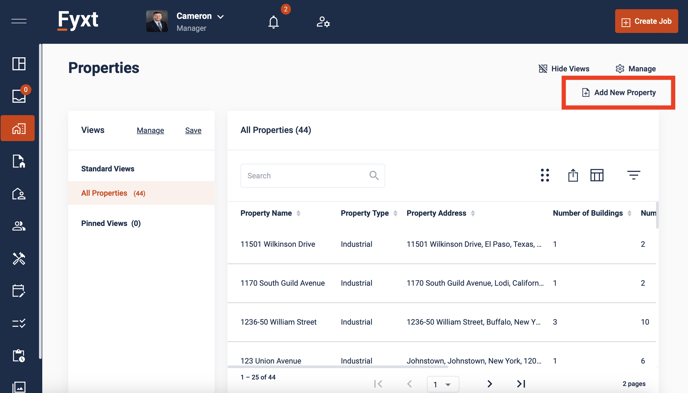
First, you need to go to the properties module in the left-side menu! Then you need to click “Add New Property”.
You’ll see a screen with some empty fields you need to fill out:
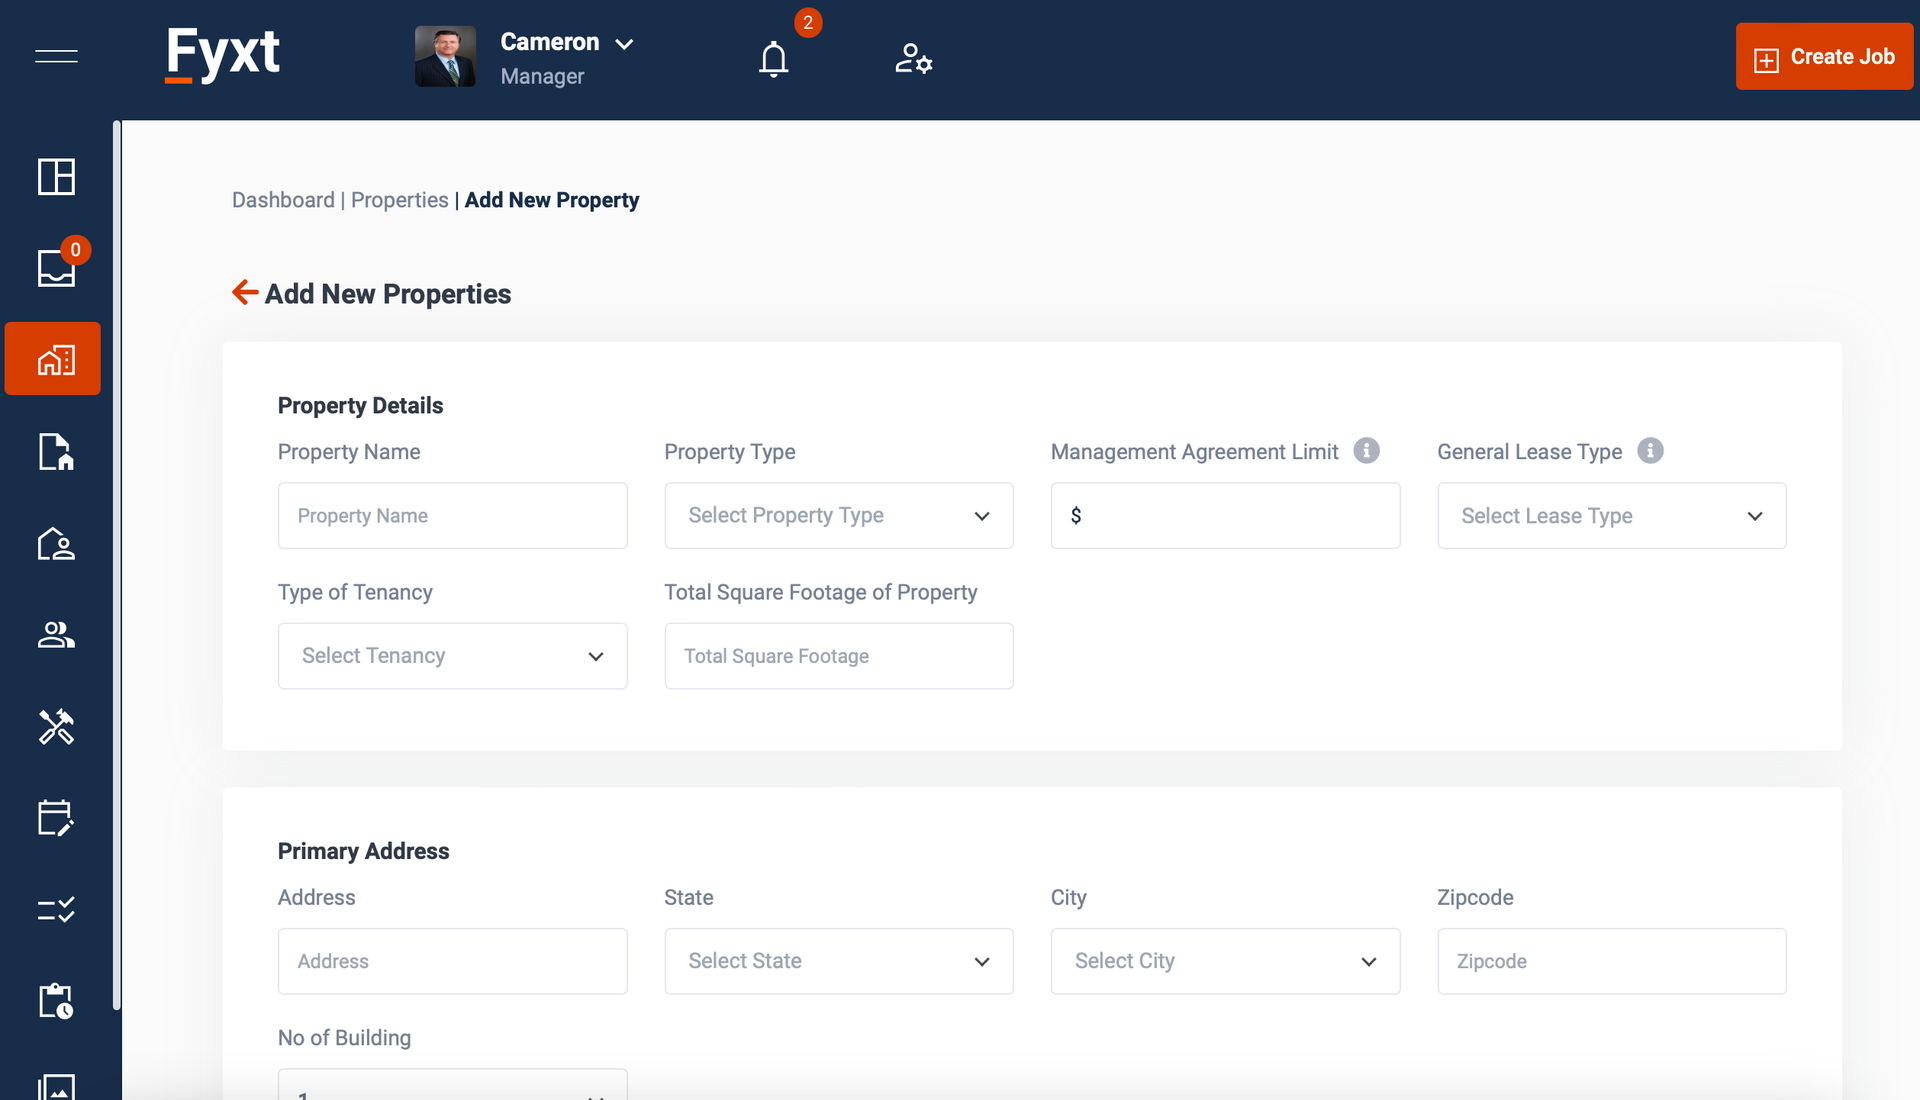
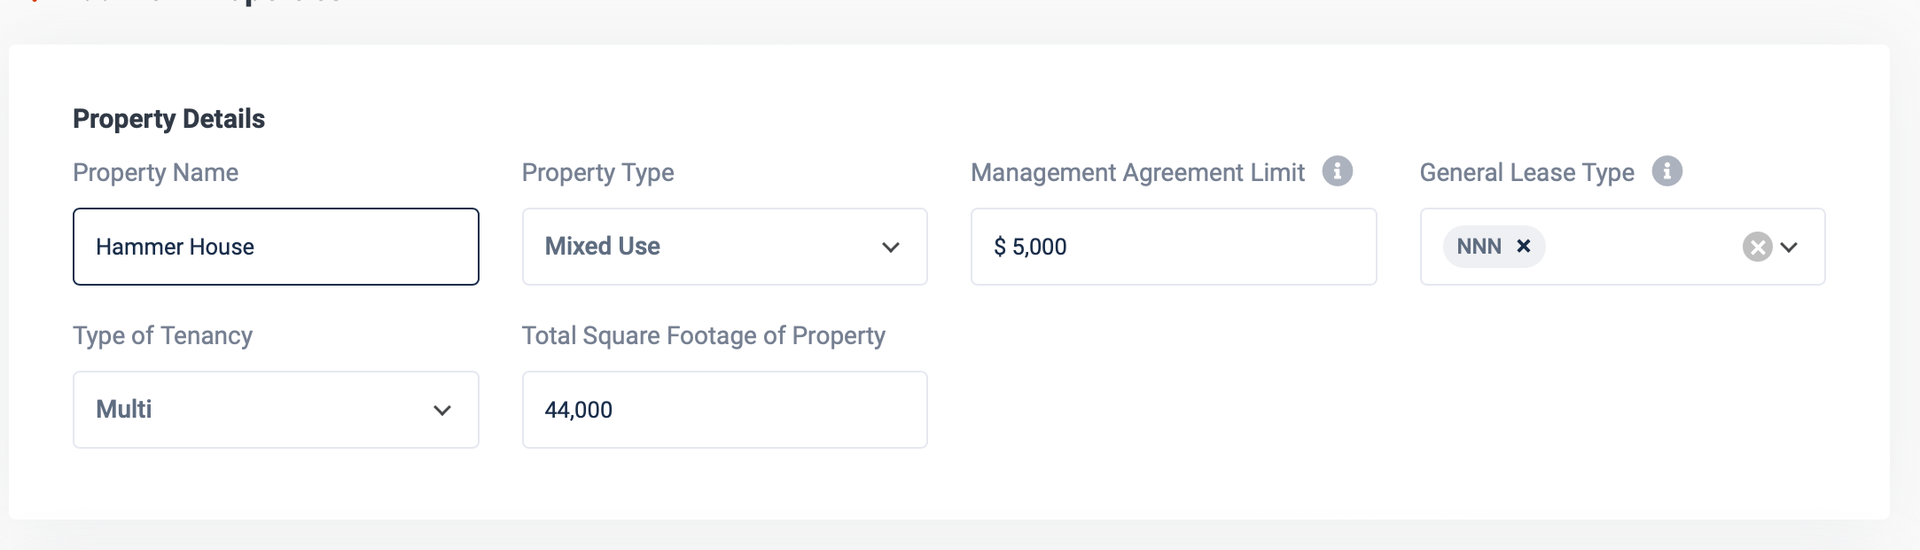
Property Details
You should name your property something easy to remember. You can use the marketing name the property is under, or maybe just even the street address.
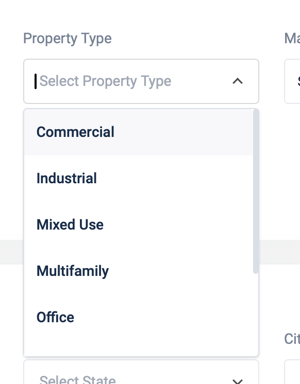
You then need to choose the property type. There’s quite a few options but choose the one that best represents the property. This will help you aggregate reports and check data against specific kinds of properties in the future.
Next you can optionally apply a management agreement limit. This set limit won't restrict invoices received, but will be available for reference should you need it.
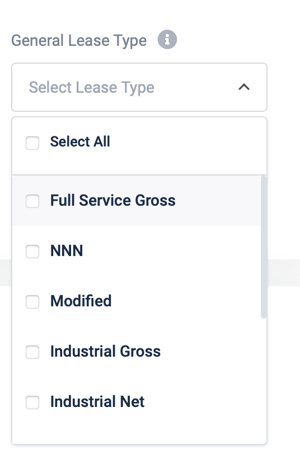
Next, set a lease type. Your options will most likely be Net (tenants bear more burden) or Gross (manager/owners bear less burden). But if your company has created a lot of unique lease types, they will also be shown here. This will make all leases created for this property default to that type.
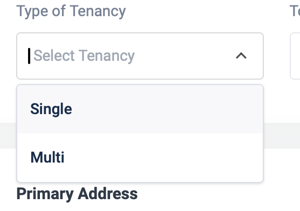
Select if the property is single or multi tenancy. Again, this value will help you filter and create reports in the future:
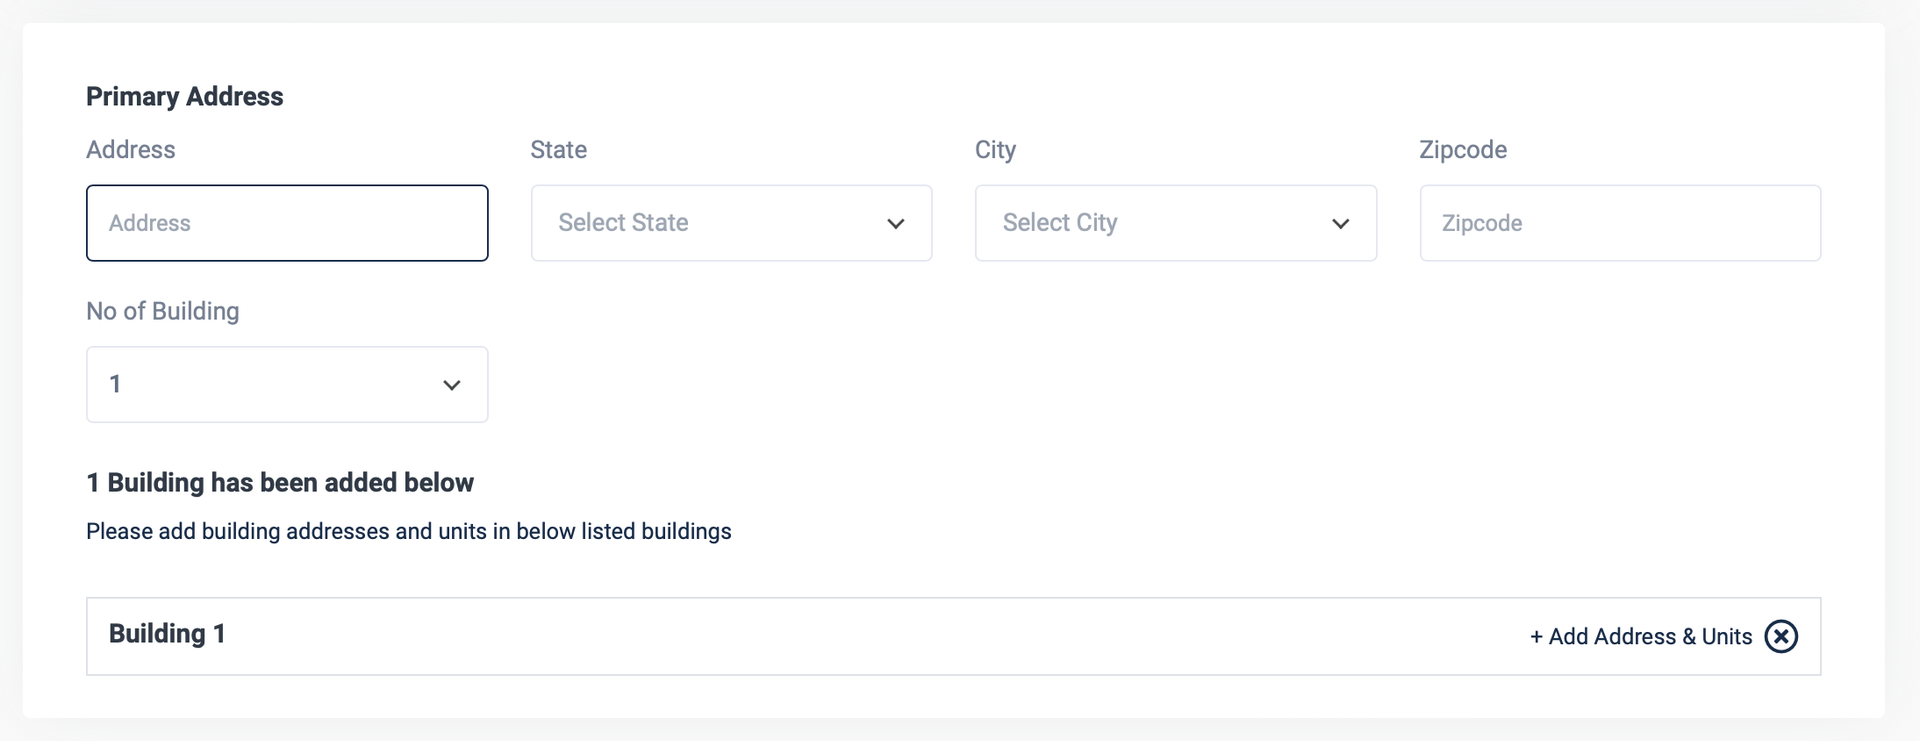
Primary Address
If a property is a complex with multiple addresses, you should still choose the primary address it will be listed under, such as the address at which all official mail is received.

All of the fields here are required.
Creating Buildings
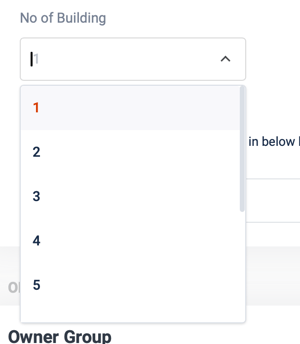
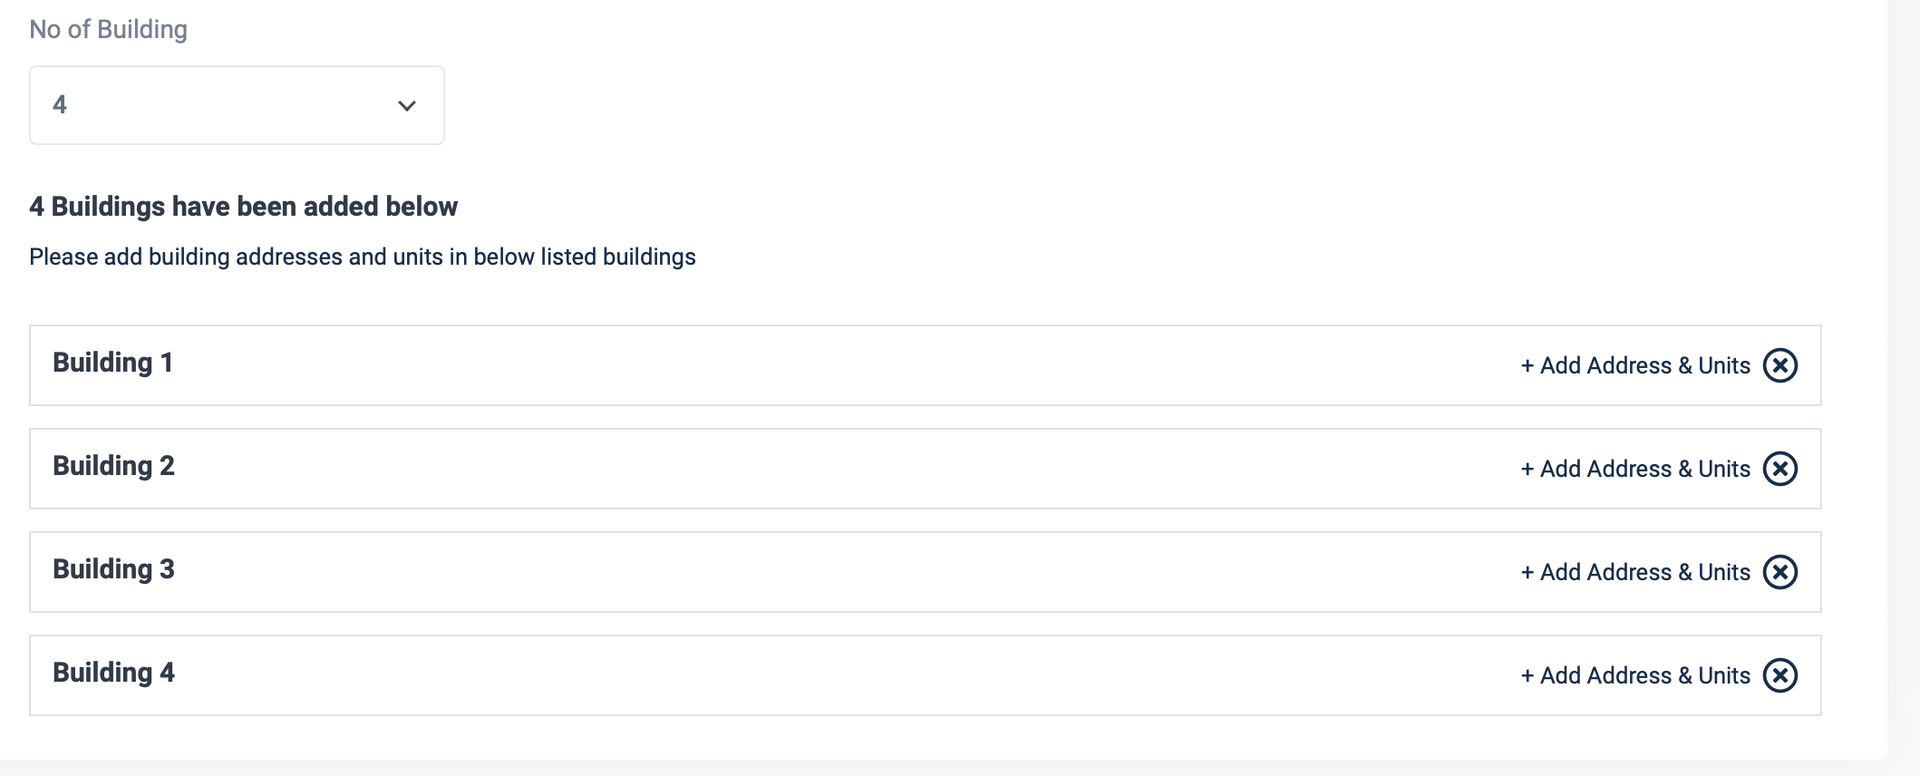
You need to declare how many buildings the property has. If it’s all a single structure, just choose one building:
If its a complex with multiple structures, click the drop down and find the number that matches.
This will create listings for all the buildings that need to be defined.
Defining Buildings
Each building must have an address and units defined. Both of these are mandatory. Even if a property only has one building with a single unit, it still needs to be set up for data clarity.
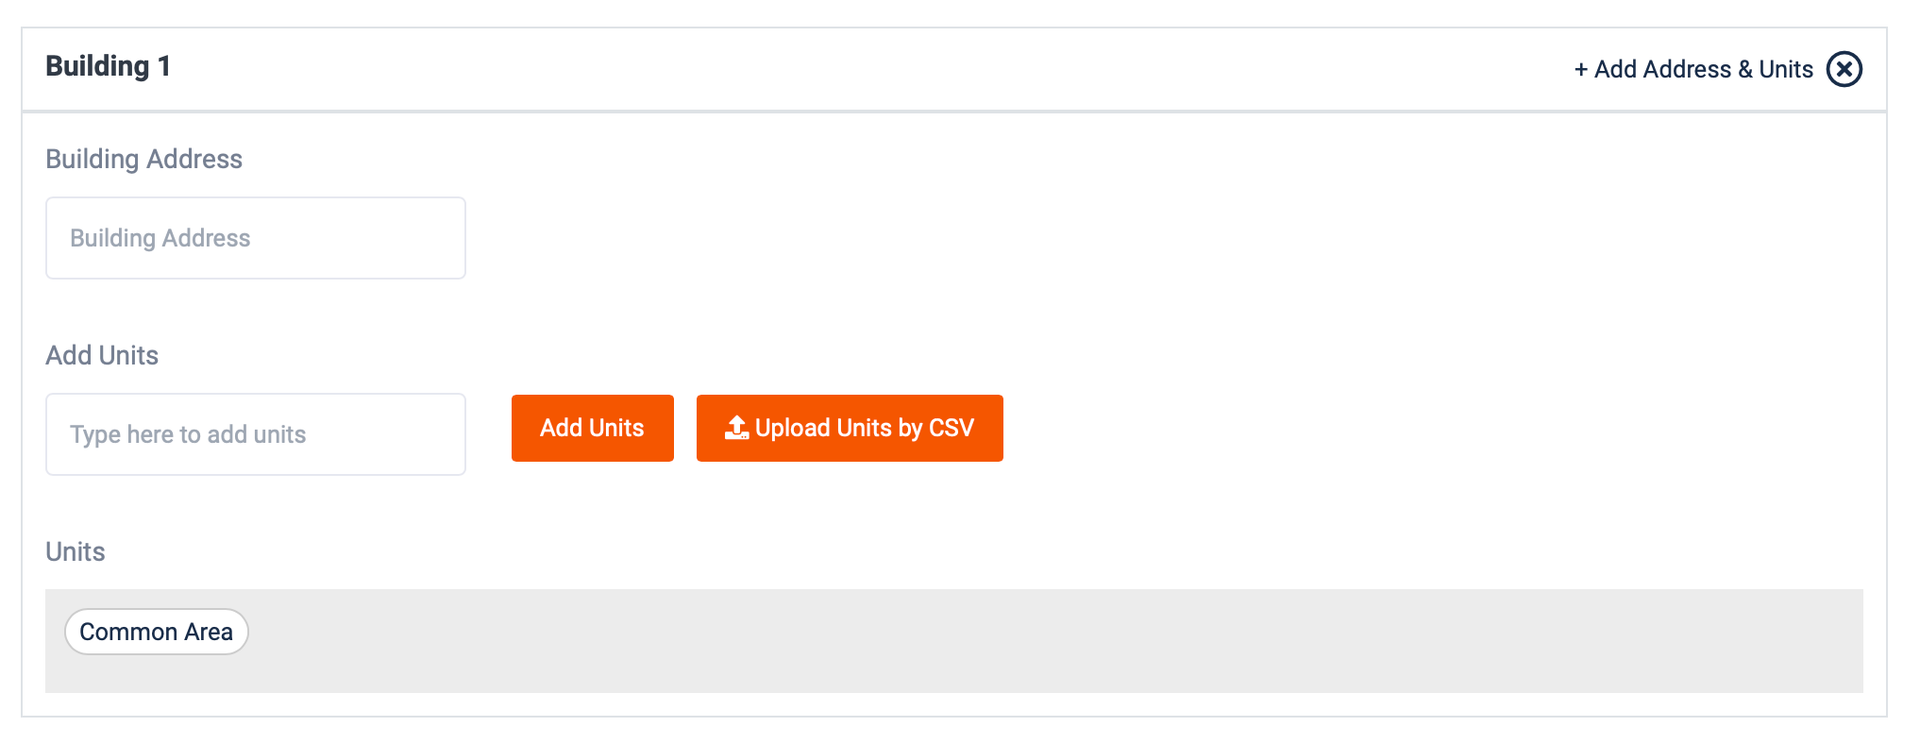
The easiest way to add units is to type the name of a unit and put a comma, type the next unit, and so on:

Once you hit “add units,” they will appear.
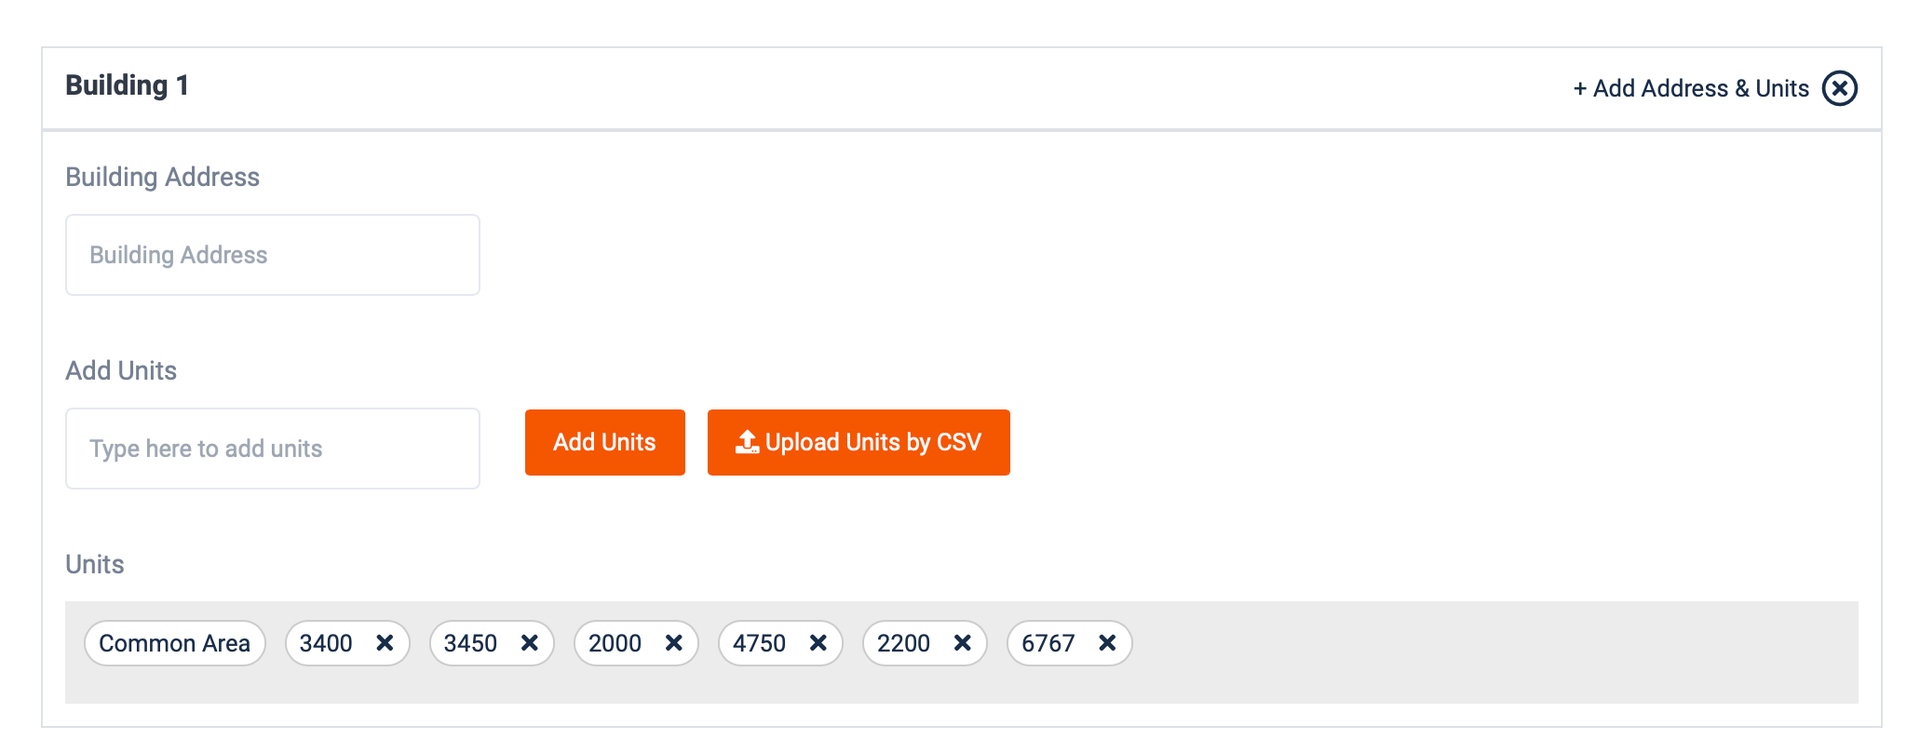
You’ll also notice that all buildings come with a default “common area.” This is especially important for multi tenant buildings that have shared common spaces, so it’s always added.
Other Property Features
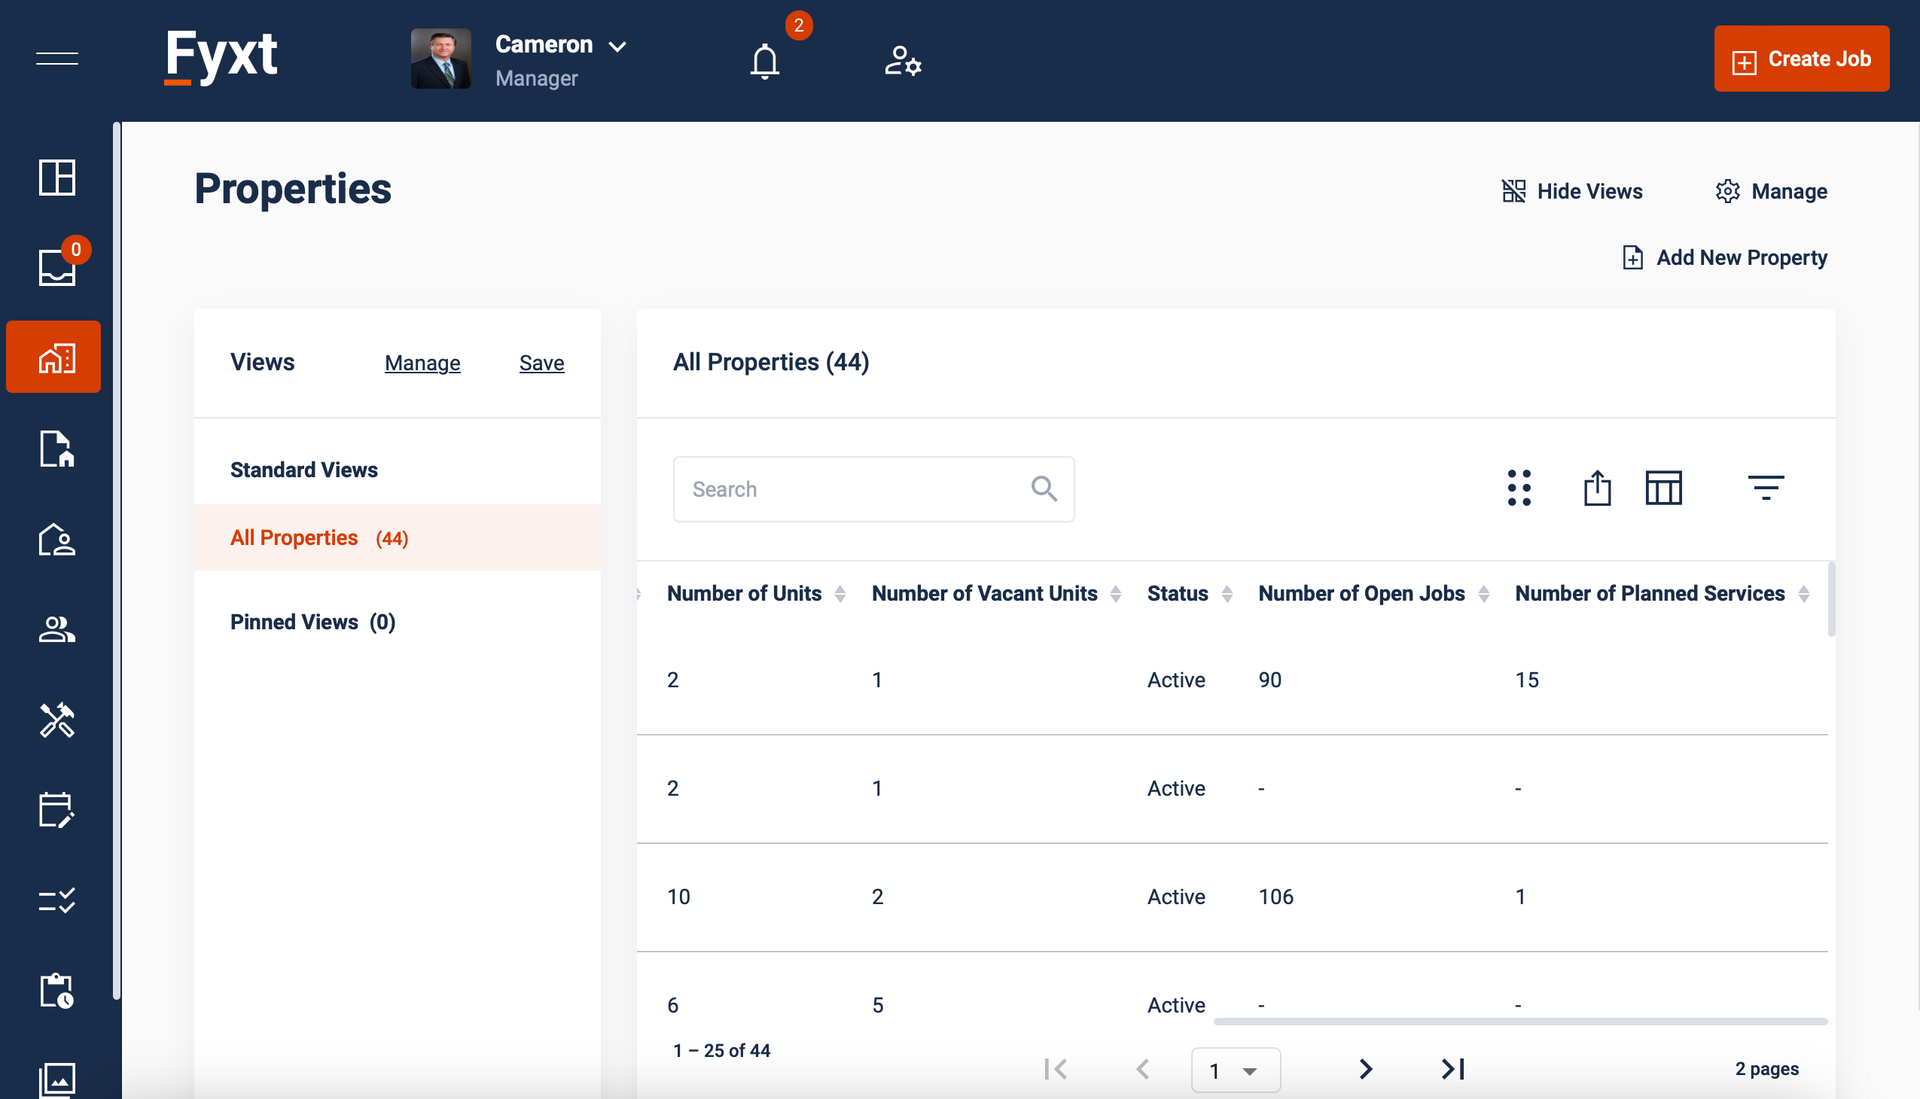
Once you’ve created one or more properties, you have a few more features you can use.
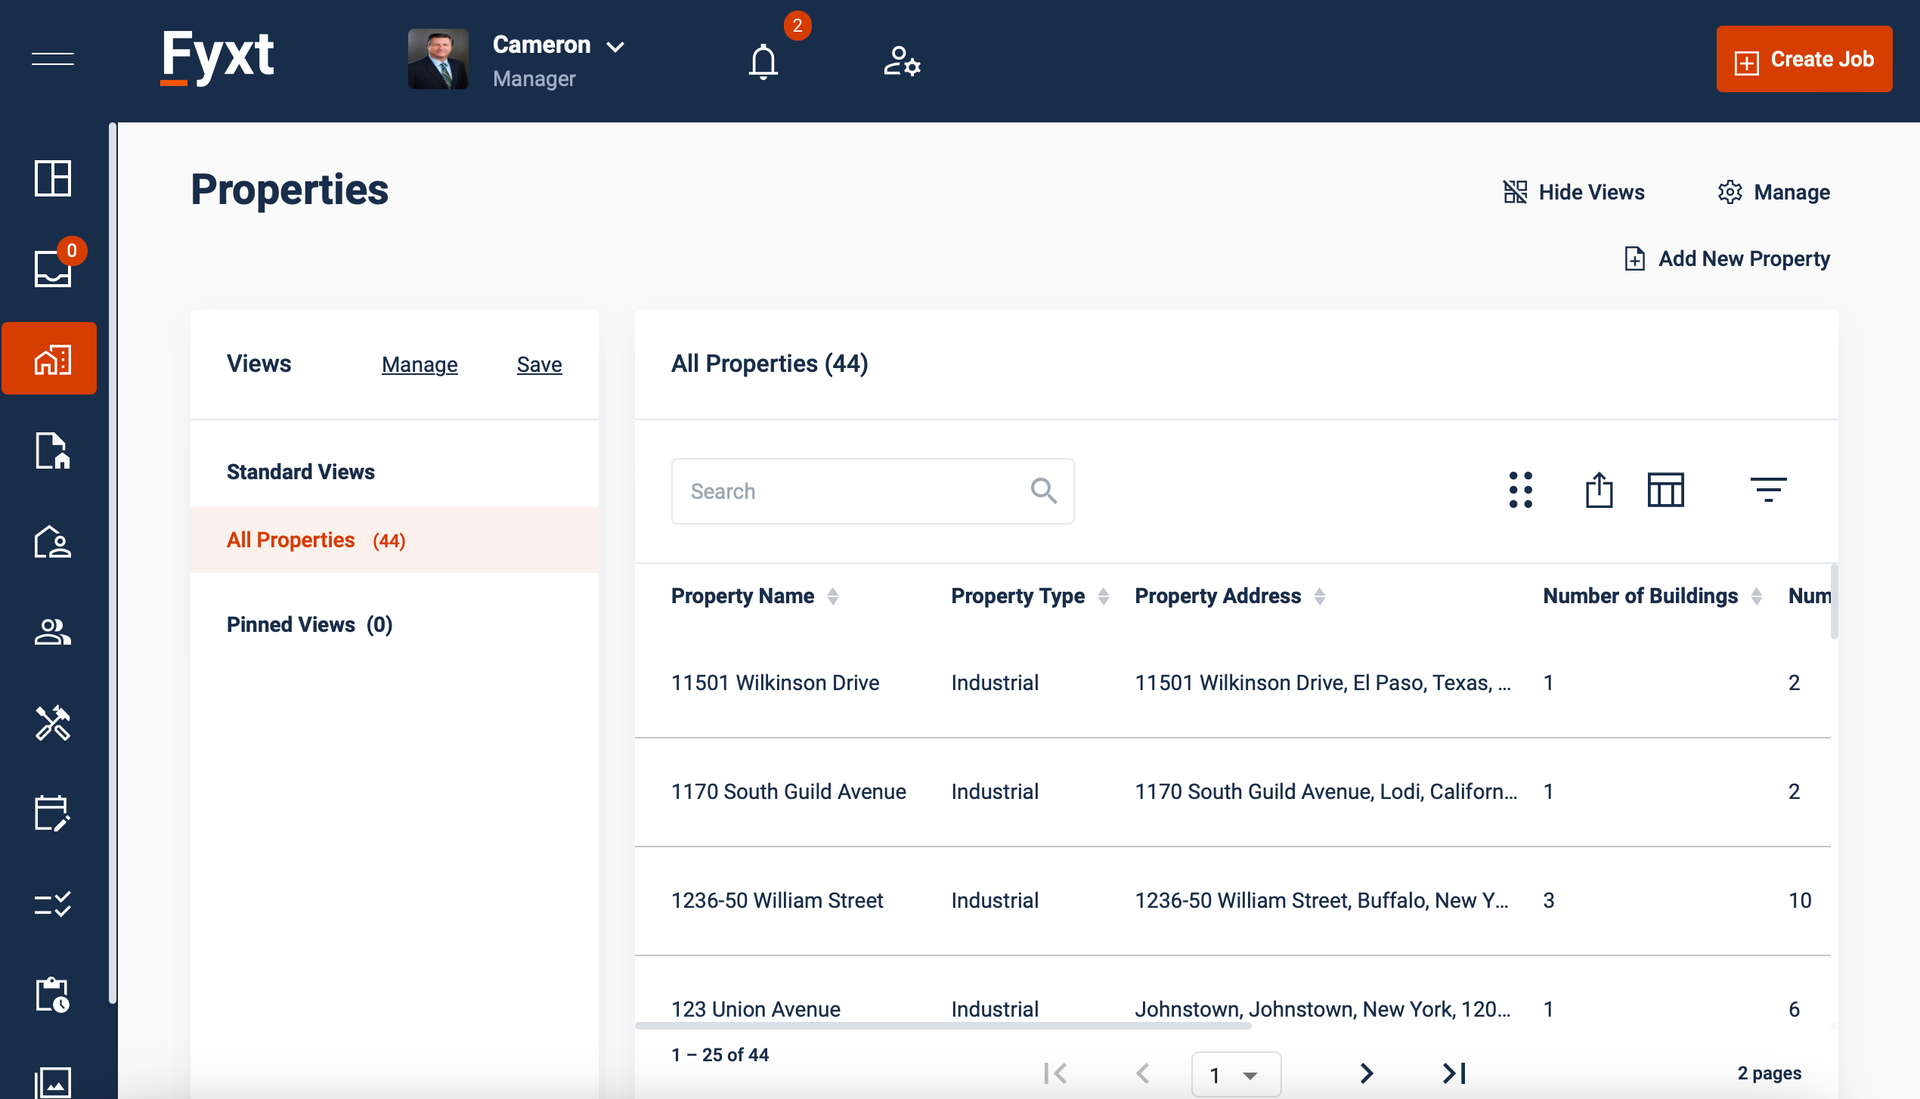
The properties table will display useful stats for quick reference about each property. You can filter these stats to find out which properties need the most attention and which ones are under control.
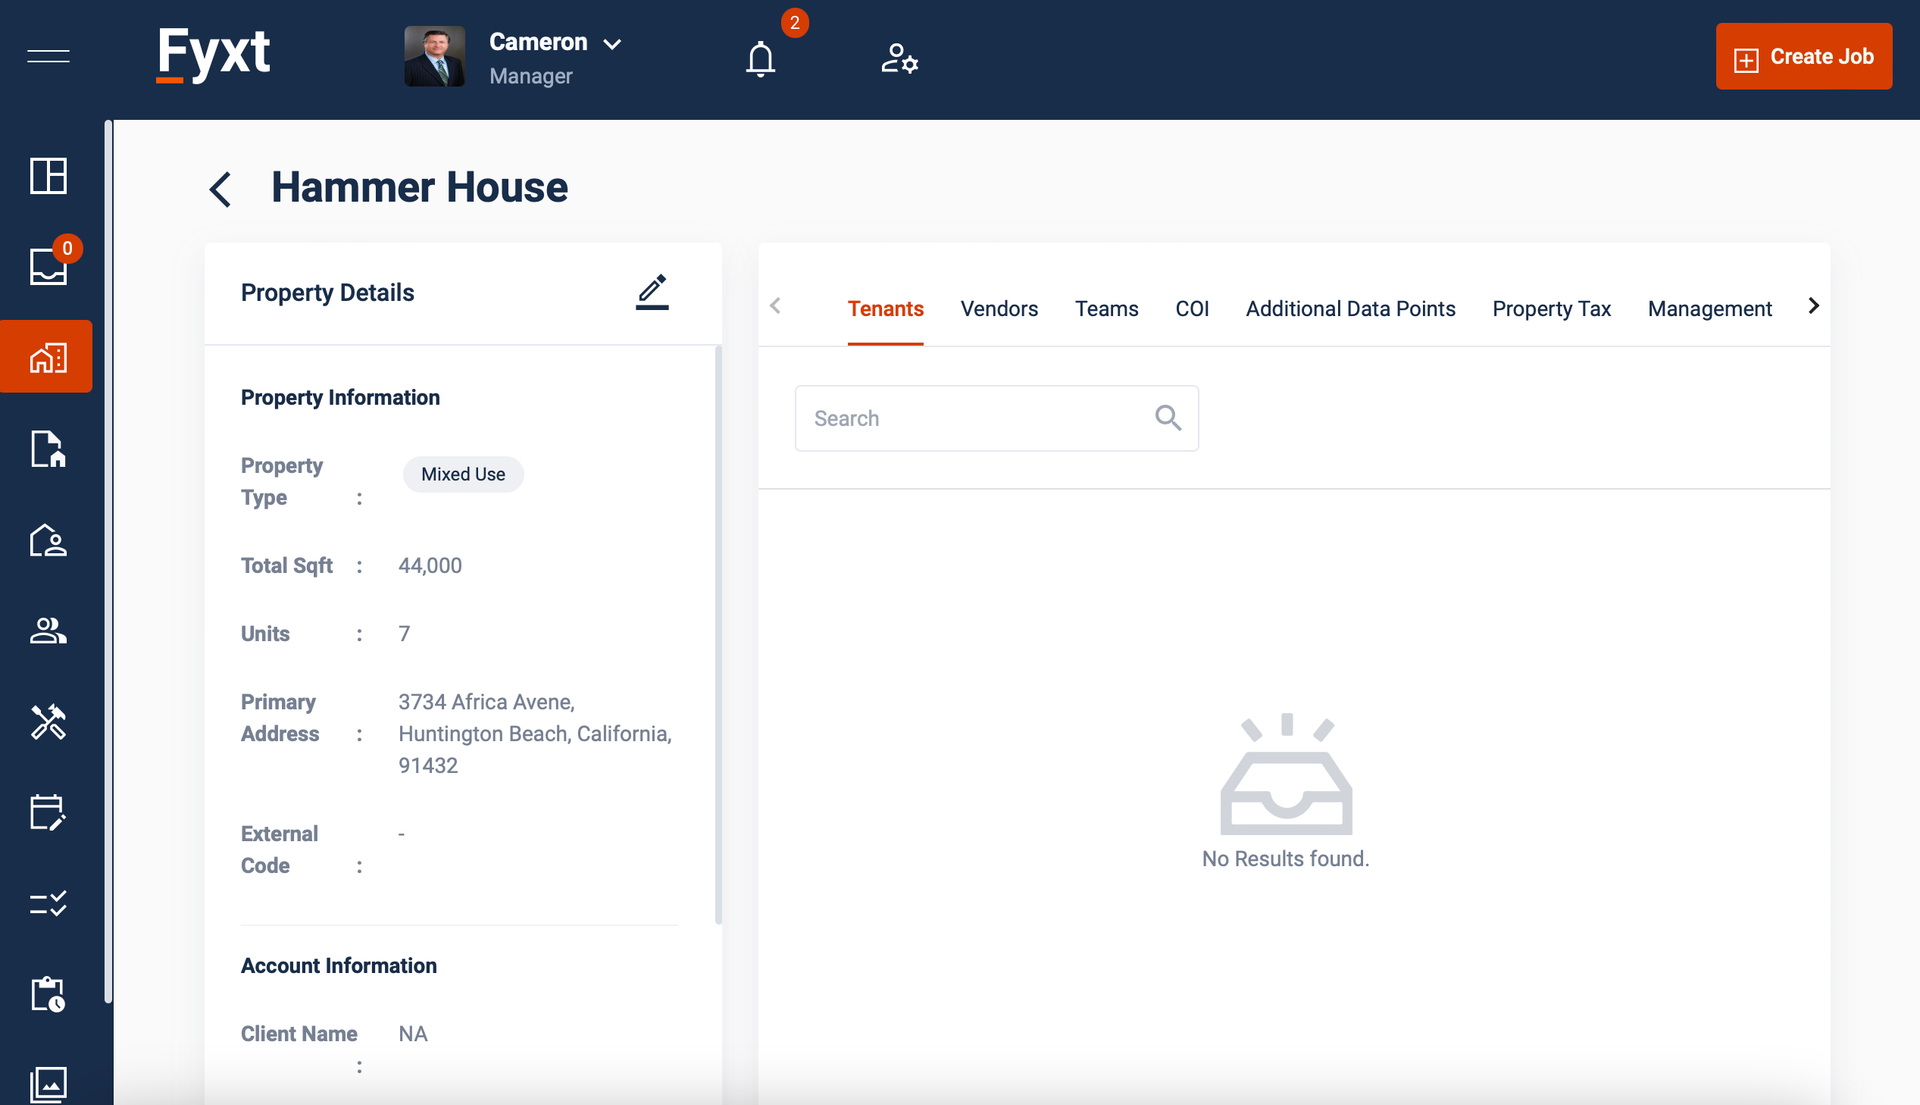
Tenants Tab
Any tenants assigned via the Companies module or Leases will appear here.
Vendors Tab
Any vendors created in the Companies module and assigned to this property will appear here.
Teams
This is where you create your manager and engineer assignments of who is responsible for working on the property.
COI
Anything created in the COI module for this property will appear here.
Custom Tabs
This is an area where you can use Custom Fields capture a couple useful details about the nature of the property. Some examples of useful Custom Fields to add might be...
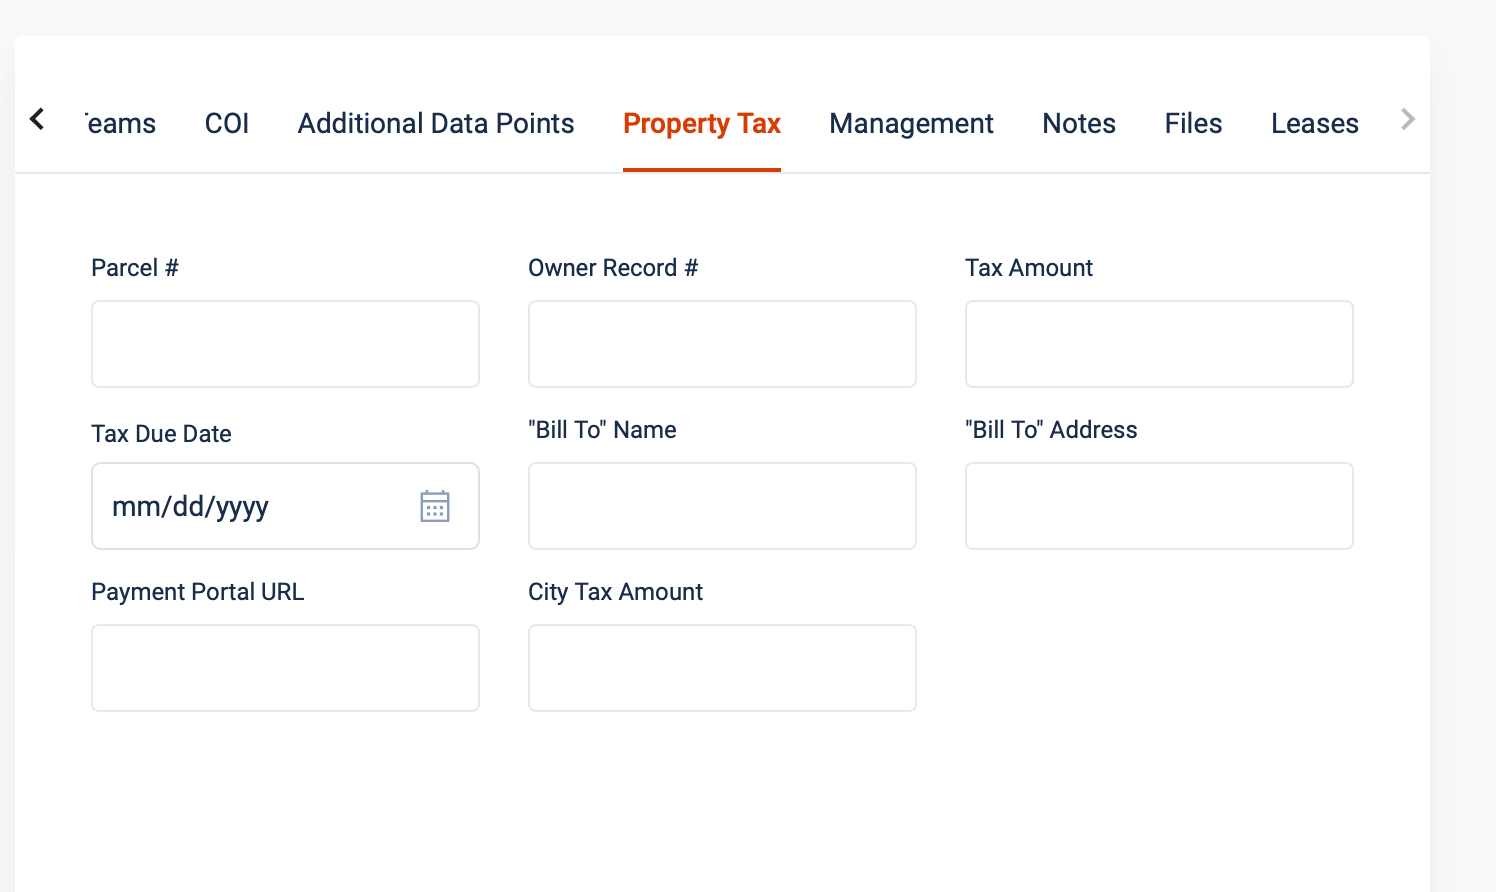
Property Tax
If your team has a hard time keeping on top of important tax details, you can capture them in this tab for future reference.
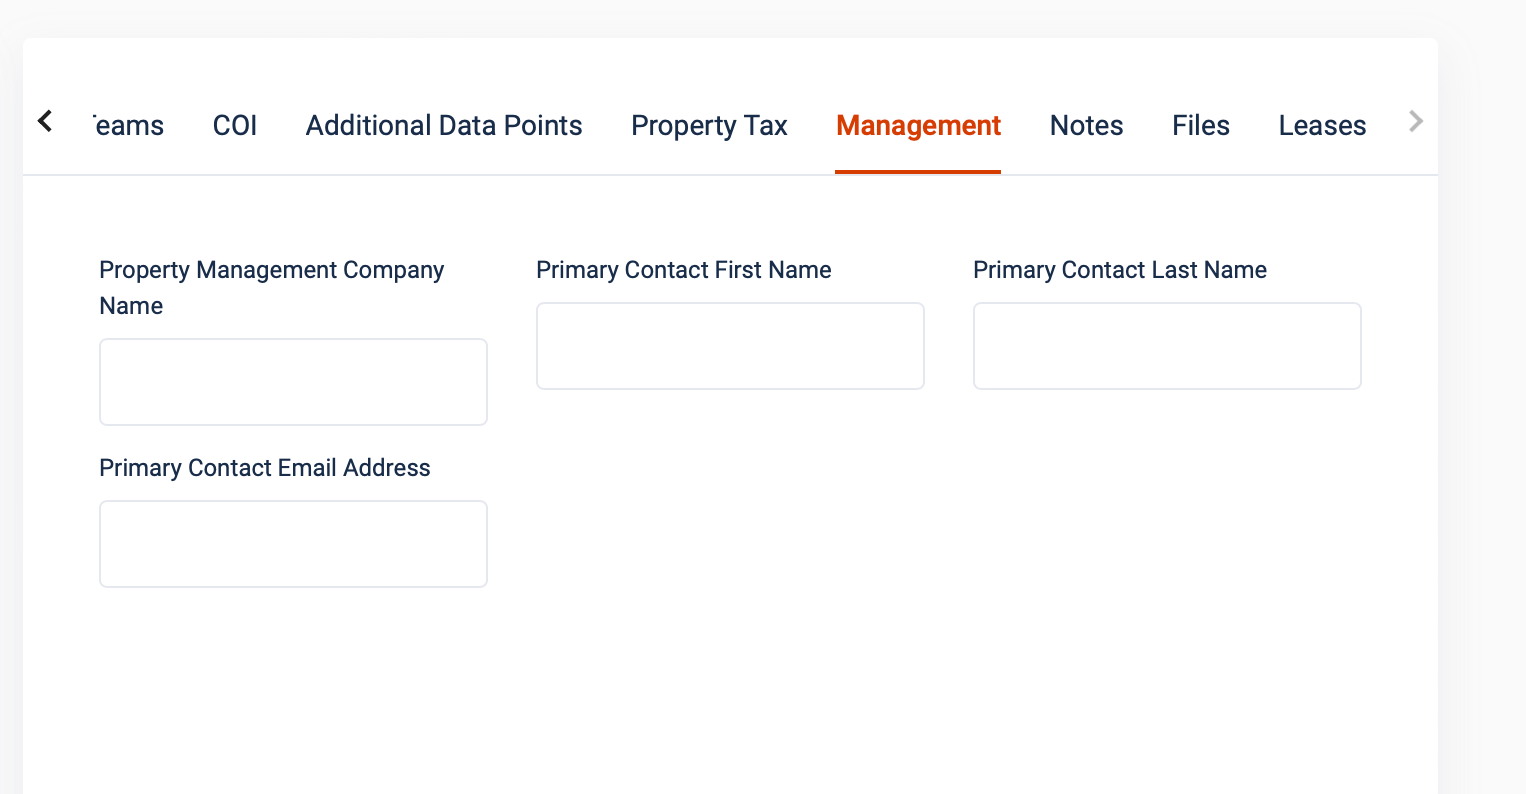
Management
If you have an external management company in charge of a property, you can capture some details about them here.
Notes
This is a fully functioning notes tab described here. Use it for any historical data and conversations that need to stay connected to the property.
Files
This is a fully functioning files tab described here. Use it for important pictures and documents related to the property.
Leases
Separate from tenants, which might just be tenant companies assigned using the Companies module , the leases tab shows any currently active lease that was created for this property in the Leases module.