Access other related articles
Introduction
The Leases module is your key to tracking which tenants occupy which units, and it also enables you to monitor the terms of each lease, allowing you to discern the financial responsibility distribution between the manager and tenant when working on a specific unit.
Before Starting
Before you can create a lease, you need the following:
-
At least one property created with units
-
Relevant maintenance categories assigned to that property
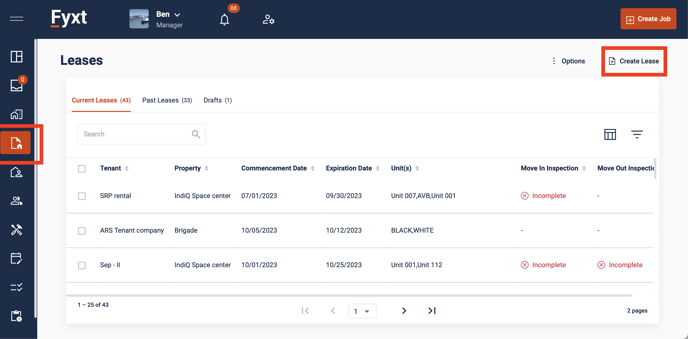
Creating a Lease
To create a lease, do the following:
-
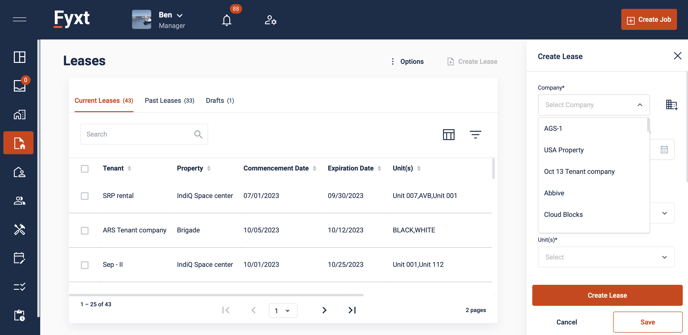
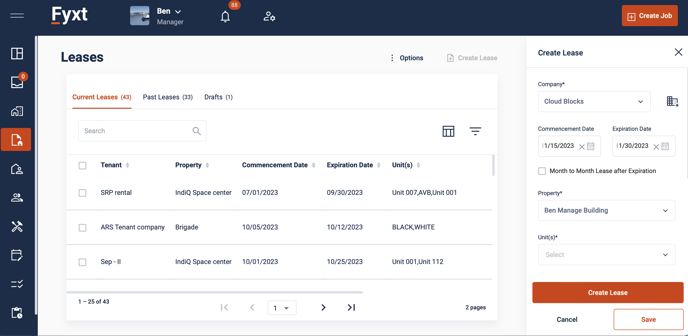
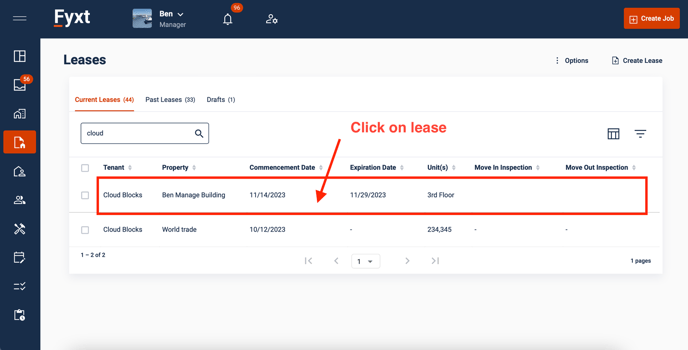
Go to leases and click the “create lease” button
-
Choose a tenant company (or quickly create one)
-
Choose the commencement and expiration dates of the lease
-
Expiration date is not required for a lease
-
You can also set a lease to be month to month after expiration, or from the very beginning of the lease if there is no expiration date
-
-
Choose the property and unit(s) of the lease
-
If the units you want to choose have another lease during the selected dates, you won’t be able to choose those units. If a lease is set to expire before the selected dates, then you can choose those units.
-
-
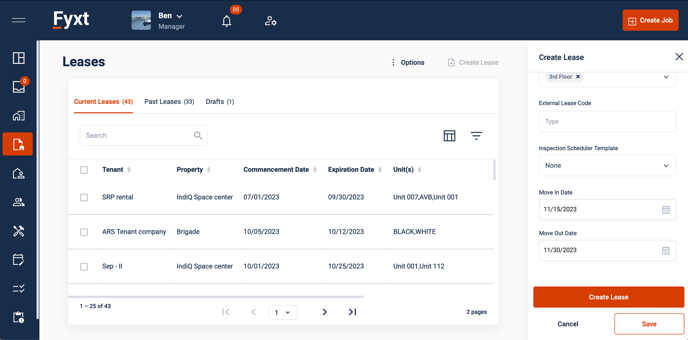
(Optional) Choose a move in/out inspection schedule template
-
(Optional) Change the move in and move out dates to be different from the commencement and expiration dates.
-
Click “create.” You’re all done!
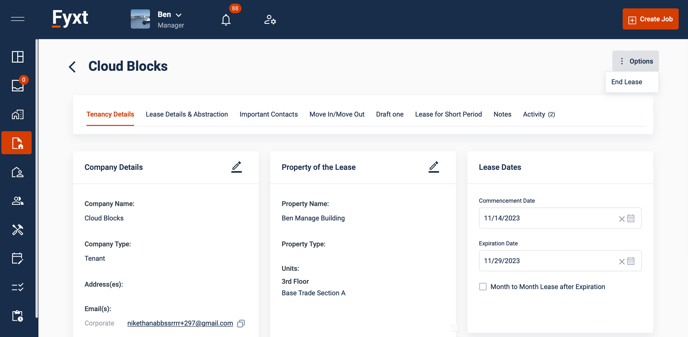
Ending a Lease
Leases do not automatically end. Note the following:
-
Even if a lease has an expiration date, it does not automatically end and move to “past leases.”
-
This is just in case you have a lease expire but the tenant has not vacated the property, and/or you are negotiating a new lease with that tenant and don’t want to show the selected units as vacant.
-
-
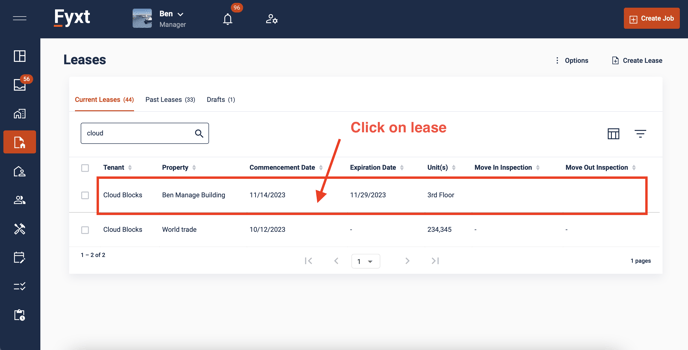
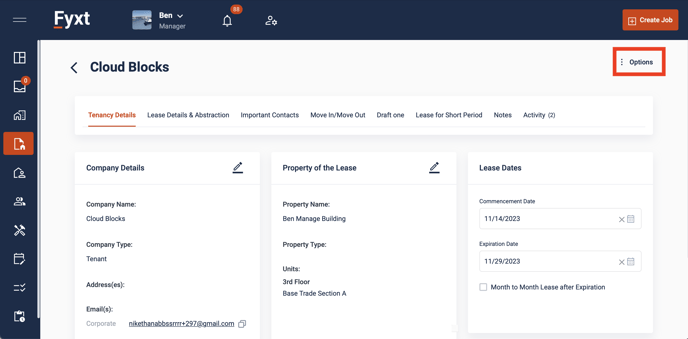
To end a lease, go into the lease and click the options button in the upper right corner. Choose “end lease.” This will make the selected units vacant and move the lease to the “past leases” tab.
-
If an expired lease is set to be replaced with a different lease you created for the future, the switch will not happen until someone manually verifies the expired lease has ended as described in Step 2.


Move In/Move Out Inspection Functionality
You can set move in/out inspection jobs to be automatically created.
-
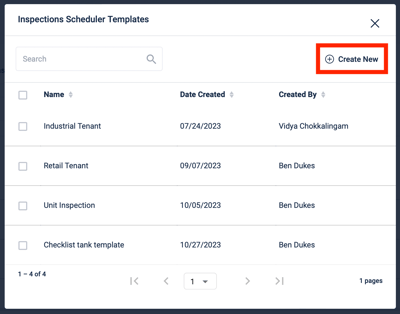
To speed this process up, you can create an “Inspection Scheduler Template.”
-
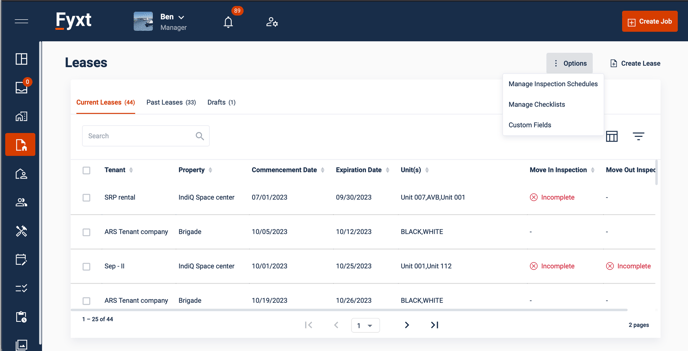
To do so, go to the home page of leases.
-
Select the options menu in the upper right corner
-
Go to “Inspection Scheduler Templates.”
-
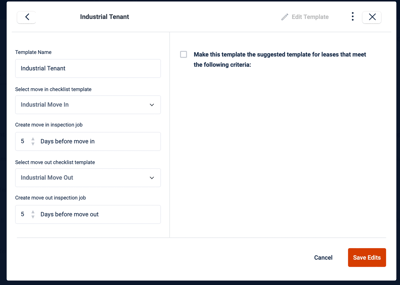
To create a new template, choose how many days before move in and move out the jobs should be crated.
-
Select the checklist you want for each of those jobs
-
Name the Scheduler template
-
Decide if you want this Scheduler to be the default for leases in certain properties, units, or with certain tenant companies
-
Save the template.
-
-
Whenever you create a lease, you can select a scheduler template. This then does all necessary set up to get the move in inspection job created. As long as you have an expiration date, or manually choose a move out date, you are also fully set up for the move out inspection.
-
A lease created without a scheduler template needs to be manually set up to have its inspection jobs created.
-
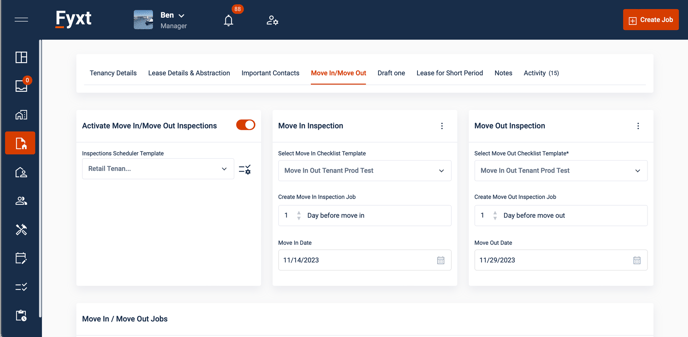
You must go to the Move In/Out inspections tab within the created lease.
-
You must click the toggle to turn the inspections on
-
You must choose checklists for each inspection, and set how many days before move in and move out the jobs will be created.
-
Move in job will not be automatically made unless you set a move in date, and the move out job will not be made either unless you set a move out date.
-
-
After a lease has inspections set up, you can:
-
Continue editing and updating the dates, checklists, etc. as your requirements change
-
However, once a job gets created (say for either move in or move out), you can no longer edit that section to change its dates or checklist.
-


-png-1.png?width=400&height=289&name=bbdfe34f-21d9-4b0f-aad5-a64934ad55ce%20(1)-png-1.png)
Manual Move in/Move out screenshots:

Lease Maintenance Abstraction
The Maintenance Abstraction within a lease is how you show yourself which party is financially responsible for specific jobs.
You can request a Fyxt employee to abstract a lease for you by uploading documents to the “Lease Documents” area.
To set the Maintenance Abstraction, click on a specific lease and go to the “Lease Details & Abstraction” tab within a lease.
-png.png?width=688&height=339&name=3843c4a6-7e64-416d-91e5-b612a2764852%20(2)-png.png)
Make sure you select the “Maintenance Terms” section within this tab.
You can set the entire lease to be Gross or Net
-
-
Gross means the manager is financially responsible
-
Net means the tenant is financially responsible
-
-png.png?width=688&height=337&name=b86607c9-b9bb-4028-8a03-d4d2dd56575d%20(3)-png.png)
You can edit individual maintenance categories to be different from the main lease choice
-
-
This means you can set a lease to “net,” but then have certain categories be overridden to “gross,” or vice versa.
-
-png.png?width=688&height=337&name=fd51294a-8d61-4adb-ab76-897dbdb5f85c%20(1)-png.png)
There is a section called “Global Rules” where you can create a special rule about financial responsibility that applies to multiple categories.
-png.png?width=688&height=339&name=5ae6dc57-5f3c-4401-94e1-dd9393671606%20(1)-png.png)
Click “Add New Global Rule” to get started
-png.png?width=688&height=339&name=c347987f-d938-4a0d-9b13-5ff659bcd3f1%20(1)-png.png)
-png.png?width=250&height=244&name=ce7bb94e-70d2-45d4-b06c-f7b0a64c7fef%20(1)-png.png)
Choose what the rule is for:
-
In unit repairs
-
Contracted Maintenance
-
Replacements
-
Building Warranty
-
Common Area Maintenance
Choose how the rule is applied:
- To all individual jobs
- Annually
- For the full duration of the lease
- Set the percentage responsibility breakdown between manager and tenant
- Choose two or more maintenance categories this rule applies to
- (optional) Add criteria to limit the rule, such as a dollar threshold where the percentage share changes, or a date that the percentage share changes.

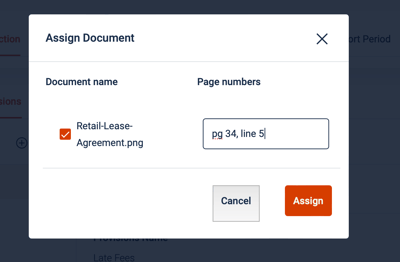
You can also make rules for individual categories rather than do everything from the global rules section. A category with a rule will show “modified” next to its Gross/Net setting. Created rules can be linked to specific lease documents and page numbers by clicking the “option” button in the rule and selecting “Assign Document.” Documents have to have been uploaded in the “Lease Documents” area.


When you create a job for the units of this lease, you will be able to see if the category chosen is Gross vs. Net, as well as preview any rules set for the category.
You can pull out specific text and ideas from a lease to make it easier to find important terms for the lease.
-
You can request a Fyxt employee to digitize lease provisions for you by uploading documents to the “Lease Documents” area.
-
To create a lease provision, go to “Lease Details & Abstraction” tab within a lease.
-
Make sure you select the “Digitized Lease Provisions” section within this tab.
-
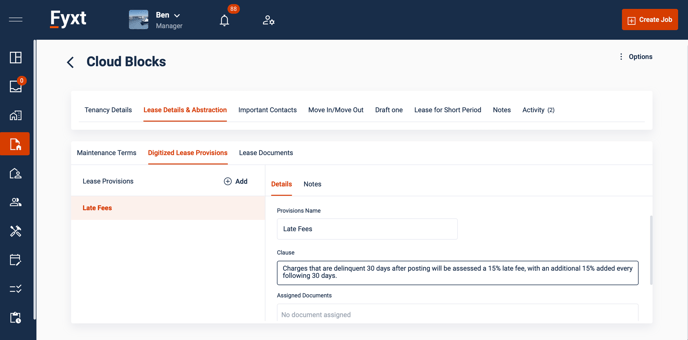
Click “add Provision”
-
Type the important and relevant text from the lease you want in the provision.
-
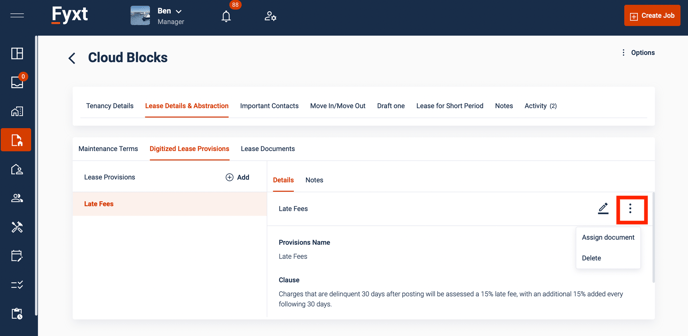
Created provisions can be linked to specific lease documents you have uploaded by clicking the “option” button in the rule and selecting “Assign Document.” Documents have to have been uploaded in the “Lease Documents” area.

-png.png?width=688&height=351&name=24c7504b-2cd7-4274-84a8-41fce2a132bf%20(1)-png.png)
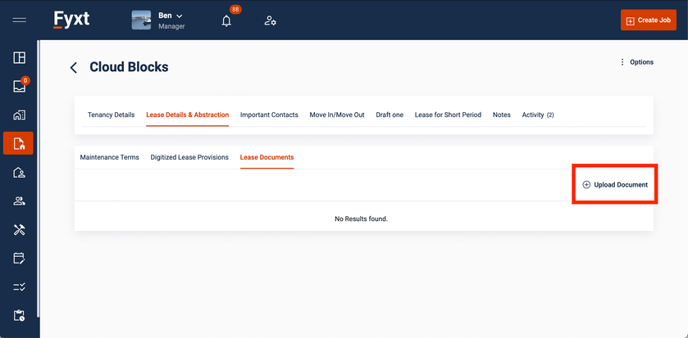
Lease Documents
You can upload all relevant lease documents to the lease itself within Fyxt for easy reference, as well as to request a Fyxt Employee to abstract and digitize it for you.
-
To create a lease provision, go to “Lease Details & Abstraction” tab within a lease.
-
Make sure you select the “Lease Documents” section within this tab.
-
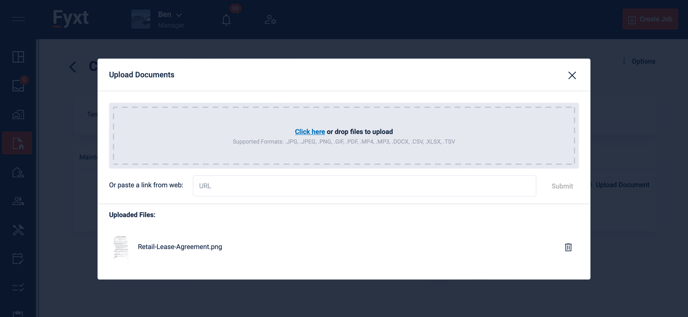
Click “Upload document.”
-
Select or drag & drop one or more files to upload.
-
After uploading, you can edit the file details:
-
You can give the file a custom title, in case the file name is hard to remember
-
You can put tags on the file for easy reference
-
You can set a contract effective date for the file to let you know when any terms it contains apply
-
you can write a brief description of the file.
-
-
Uploaded files can also be previewed by clicking on them.
-
If you want a Fyxt employee to read the files and set up your maintenance terms and digitized lease provisions for you, do so by requesting an abstraction.
-
Click the three dot menu on any file
-
Select “request abstraction”
-
All files on the same lease requesting abstraction within the same day are considered a SINGLE abstraction request
-
You will be notified when the Fyxt employee finishes the abstraction, and all their changes will load to the maintenance terms and digitized lease provisions.
-
Your account will have abstraction credits deducted for each abstraction request
-
if you have no abstraction credits, contact your account manager to request purchasing new credits.
-


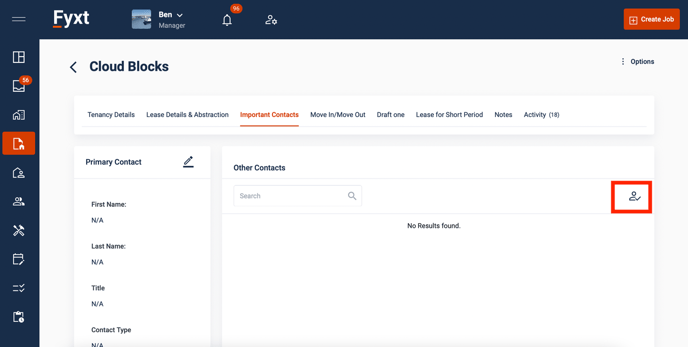
Lease Important Contacts
The Companies and Contacts area of Fyxt might contain a lot of information. If a tenant company is very large and has many leases in many locations, it can be hard to keep track of who to contact for issues regarding a specific unit or specific lease. This is where the Lease Contacts area comes in.
-
To assign contacts to a lease, go to the “Important Contacts” section within a lease.
-
You may choose or create a primary contact; this is the person who should be notified first with any questions or issues regarding the leased units
-
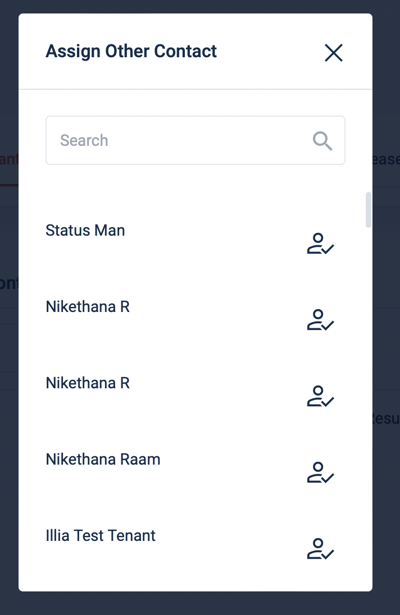
You may assign or create other contacts. These might be people who are responsible for specific things, like billing questions or access requests. You can help yourself keep track of what these contacts are for by giving them unique titles.