Access other related articles
Basic Job Info
There are five basic parameters that are needed for every job.
-
Service Type
-
Property
-
Location
-
Category
-
Brief Description
Service Types are a big list of job types you might want to track. They can be anything from Repair, Replacement, Preventive, Office Administration, etc. This is the primary identity of the Job. Service Types are fully customizable for your account. To customize Service Types, please contact your Fyxt Administrator.
Property is the physical grounds/structure where the job is taking place. Properties are their own big concept in Fyxt with lots of features, such as team structures, manager assignments, and so on. The property chosen for a job will affect who gets notified about it and who can see it.
Location is the smaller, more specific area of the property where the job is. This could be a leased unit or a common area. If you are using Fyxt’s Lease Module, the location selection will tell you which tenant will be affected by the job.
Category describes the nature of the work done in a job. A job might be a repair or replacement type, but what is being worked on? What’s a more detailed way to describe the job? Categories be anything from HVAC, Plumbing, Administrative - Conference Room, and so on. You can also associate these categories with vendor companies in the Companies Module so they’ll be easier to find when working on those kinds of jobs. Categories are also customizable for your account and can be filtered for specific properties. Talk to your Fyxt Administrator for more information.
Brief Description is the shortest, simplest way to describe the last specifics of the job. It can be a general title for the job, or even serve as a quick explanation of what the problem is, such as “HVAC turns off on its own.” Think of it as an email subject line trying to encapsulate the main idea behind the job.
What’s all this for?
The above information will capture everything you need to get started on a job. The property and location information will help you know which engineers and managers are involved, and what tenants are involved. The service type, category, and brief description documents the basic details of the actual work to be done. This should be enough to get a job moving where you can use all of Fyxt’s other more robust Job Module features.
Creating a Job
At the top right of every page in Fyxt is the Create Job button. That’s how important this feature is!

When you click it, you’ll see the create job form:
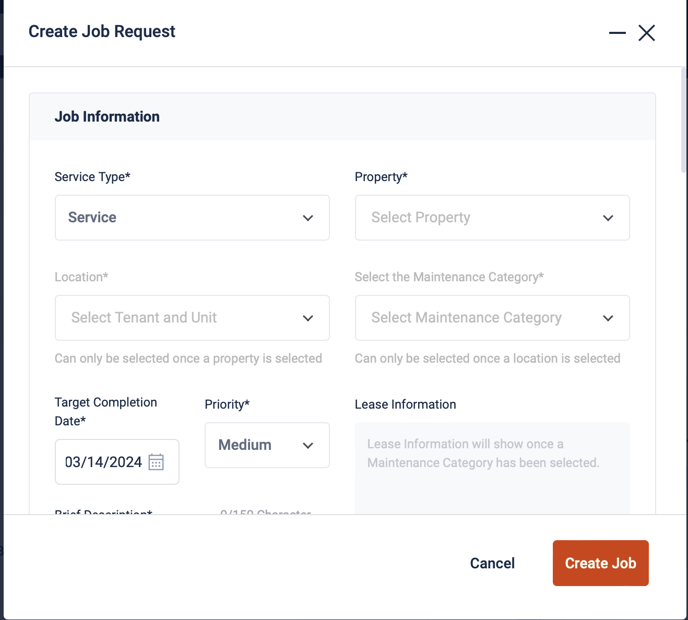
We already discussed the basics of a job. You’ll have to fill out the first 4 in this order before proceeding:
-
Service Type
-
Property
-
Location
-
Maintenance Category

Only one more field is required to create your job and get started! Brief Description. Scroll down past Target Completion Date, Priority, and Lease Information to get to Brief Description.

Target Completion Date and Priority start out filled for you, and you can change them now if you want. But don’t worry! You can also change Target Completion Date and Priority after you make the job and have a better idea of what you need. Also, the Lease Information panel is just a quick reference to let you know if the chosen location has an active lease and what terms/expectations there might be. Jump to Brief Description, fill it out, and create the job!

You’re all done! There’s some more detailed features hidden under “Optional Field” but you don’t need them to get started.
Working on Jobs
Now that you've create a job, there’s a few more things you can do.

Try filling out the detailed description now that you have a bit more time.

After you finish, something happens. Check the activity log!

There’s now an item in the log showing the edit you made. This is true for all details of the job, and true for all users that edit it. This will help your team keep your information straight!
Speaking of team, now that you have a job made, you might want to assign some team members to keep track of it.
Assigning Team Members
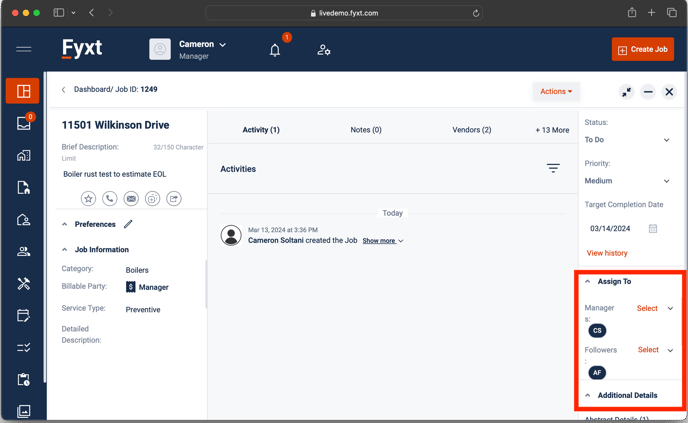
The bottom right of the job is where you handle all other team members working on a job:
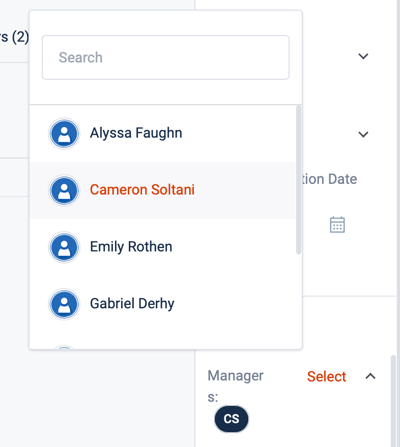
For manager, you can assign yourself if you’ll do most of the managing, or you can assign someone else in your organization. Only one manager may be assigned.
Next you can assign followers. These are any and all team members you want to get notifications about the job progress. They don’t get any tasks assigned to them, they’re just kept in the know when the job changes work status or gets assigned to team members. Multiple people can be assigned as followers. They will be notified for the below actions.
- Being assigned as a Follower - delivered via email and in-system notification
- Timesheet submissions - delivered via in-system notifications
- Materials submissions - delivered via in-system notifications
- Job Status changes - delivered via email and in-system notifications

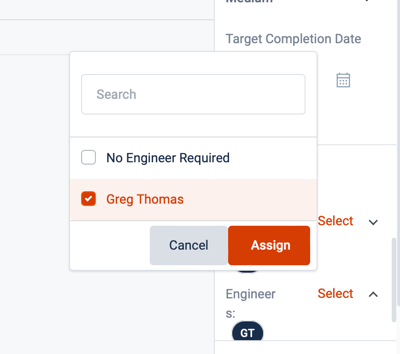
You can also assign engineers. These people will be notified and they will know there is work expected for them to do on the job. You can assign one or more, or you can specify no engineer is required. Only Engineers assigned to the property's management team will populate the dropdown to Assign Engineers.
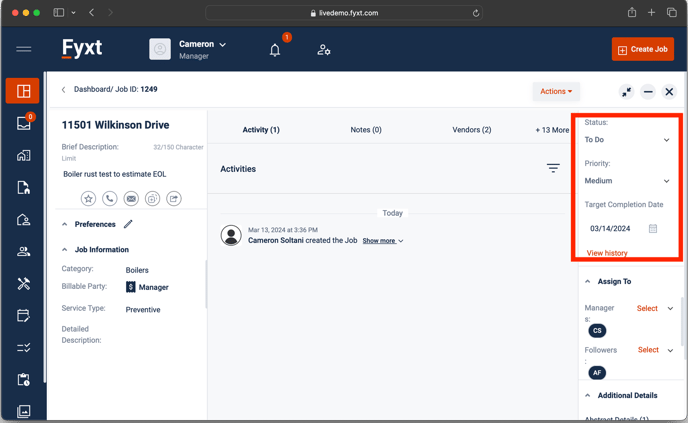
Updating Details
There are a few more details in a job that can help you stay on track: status, priority, and target completion date.
If you keep these fields correct and up to date, it will make searching and filtering your list of jobs on the Dashboard much easier. You can develop your own workflows around which jobs you check in on depending on these states, which steps you take when, and so on. Learn more about this in the help doc about the Dashboard and Views.
Status
This is probably the most important detail on the right-hand side.
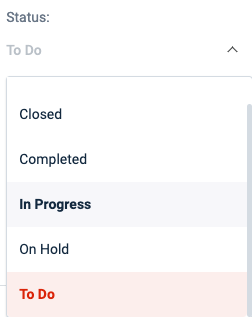
Status is how you keep track of where in the process a job is. To do means not started yet. On hold means there is a problem. In progress means it’s being worked on. Completed means responsible parties consider the work of the job finished. Closed means the approving manager has reviewed everything and agrees everything is finished. A closed job will be removed from the dashboard and moved to the “all jobs” page. Some job statuses are required in all Fyxt Accounts, but we can add new ones or change the names of them to suit your organization’s unique needs. Reach out to your Fyxt Admin to learn more.
Note: Unless you verify that a job does not need an engineer, you might have to have your engineer submit a time sheet before you can close the job! Learn how to verify a job doesn’t need an engineer in the assigning team member's section. Fyxt is working on an update that will allow certain accounts to bypass this step. For now, consider just switching the job to the “no engineer required” button after work is done if you’re not using time sheets.
Next, check out Job Information!
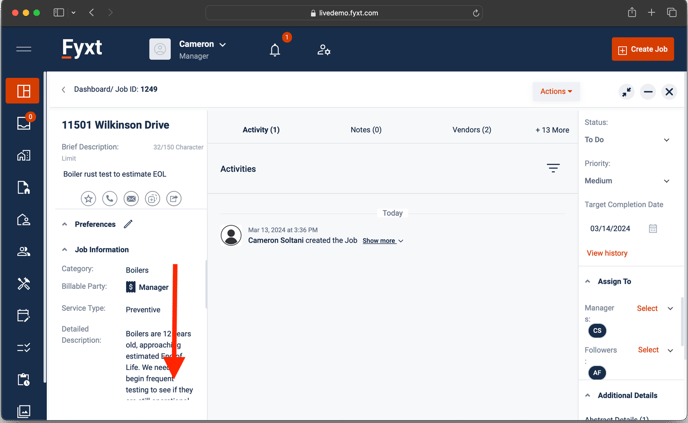
Scroll down to see all the fields here. You can edit them to keep track of important details about the job.
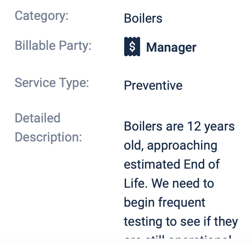
First is some of the info about the job you already filled out: the category and service type. And here is where you can click to fill out the detailed description. Also, you’ll notice the billable party identifier. This isn’t the final say, but this field guesses who should pay for a job based upon any relevant lease information that was put in the system.
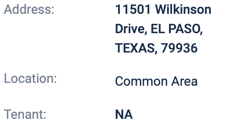
Next is the information about the property address, the chosen location, and any tenants that are leasing that location.
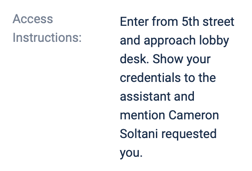
Last, and hard to find, is an important section about access instructions. You can fill this out with the best information you have. This info will be seen by engineers as well as vendors who come trying to work on your job.
Exporting a Job Report
When exporting a Job Report, you can customize the data to include in the pdf. Simply select the Actions menu from within a Job, click Export Job Report, and select from the available options to tailor custom reports meeting any need.

There’s so much more!
Jobs make use of the Files Section, Notes Section, Vendor Management, and can be organized and followed from the Dashboard. Each of these features has their own knowledge article linked, so check them out!