Assigning a vendor to a job
When you’ve created a job, you can assign one or more vendors to it from the vendors tab.

To assign a vendor, it must be set up as a company with a primary contact. If you haven’t set the vendor up already, you can do that from within the job after you click “assign vendor.”


You can also create the primary contact for this new vendor company at the bottom of the create company form:


A created primary contact must have at least a valid US phone number or a valid email address.
Reason to assign more than one vendor to a job
You might have multiple vendors who could execute a job, but not be sure which one is available the soonest or will offer the best price. Figuring out who is available and how much they’ll charge can be managed by adding more than one vendor to the job, but not approving any of them yet to actually start the work. After assigning two vendors to a job, you might see something like this:
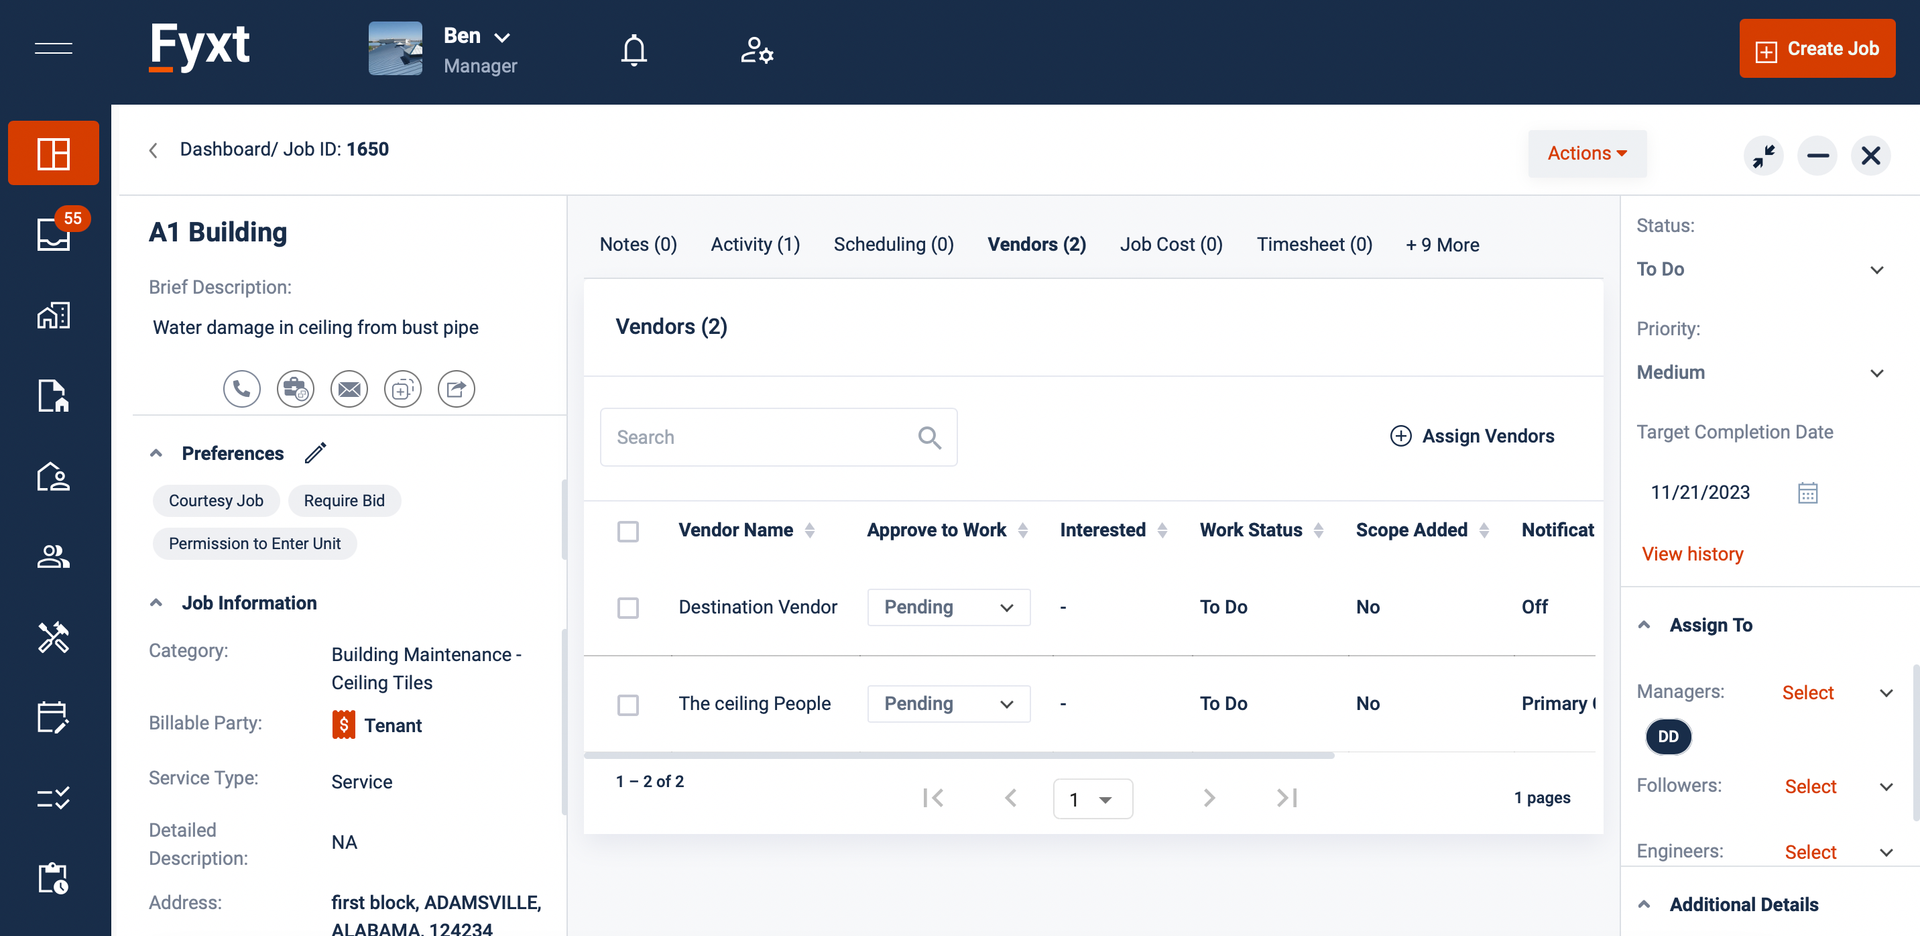
As you see, the “approve to work” for each vendor starts out in pending. This means they have not been instructed to start work yet.
Sending notifications to vendors
Once you’ve added a vendor to the job, you can give Fyxt permission to automatically notify them of the job and give them a link to record status and upload bids/invoices/etc.
To initiate sending notifications to a vendor, scroll to the far right of the vendor in the table and click the 3 dot menu:
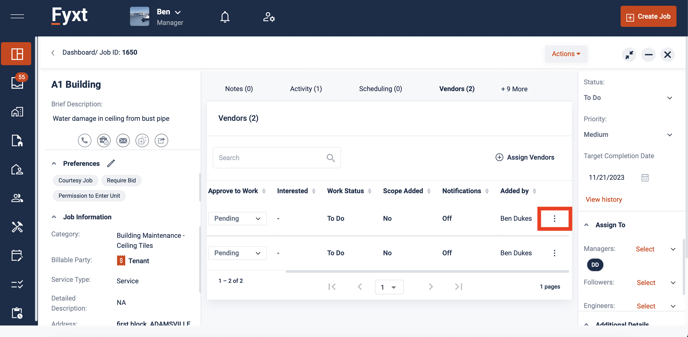
Then select “notify vendor:”
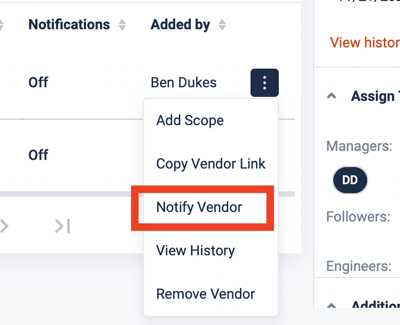
Doing so will send a notification text/email to the primary contact of the vendor company and change the vendor’s notification status:

Unless you go back and disable notifications, the vendor will now get updates when you change their approval status to work or change the approval status of any bids/invoices/etc. they upload.
Copying Vendor Link
If you don’t want Fyxt sending automated messages to a vendor, you can craft a customized message to them and include their unique vendor link. Sending them their unique link that way will still enable them to read about the job and upload bids/invoices/etc., but they won’t get notified of you approving or rejecting anything.
To find a vendor’s unique link so you can send it to them, click the 3 dot menu on their line in the vendor table and select “copy vendor link.” This copies their unique link to your clipboard.
Even if you enable notifications, it might be useful to copy a vendor's link to send to them if they lost any of their notification emails.


Adding Vendor Scope
Is the details written in the job not specific enough for the vendor? Or do you want to give different scenarios to different vendors and see which one works best for you? Do this by adding a scope to each vendor. Click the add scope button in the 3 dot menu:


Once you click that button, it will bring up a special form to write detailed instructions that only the vendor can see:

You can come back to this form and edit it as much as you like, and even review the history of the scopes that have been assigned to the vendor.
Approving a Vendor to Work
If you want a vendor to get started right a way, and no longer care about getting a bid or vetting them against other vendors, you can make them approved to work. To do so, go to their entry in the vendor table and change their work approval status to “approve.”

This approval will show up in the vendor’s unique link, and will also send a notification if they are enabled.
NOTE: Only one vendor at a time can be approved to work on a job. Approving one vendor will reject the others:

Rejected vendors get a friendly message letting them know they job is no longer proceeding for them, without actually using the word “rejected” in their communications.
If you’re ever creating a job, and already know exactly who the vendor is that needs to work on it, assign only them to the job in the job creation menu. This will make an option appear to immediately approve them to begin work:

Reviewing Vendor Costs
When a vendor submits a bid/invoice/change order through their unique link, it will appear in the job’s job cost tab:

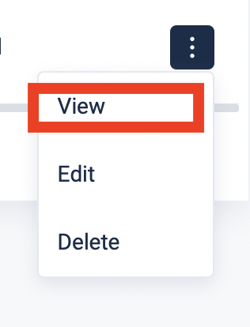
To review the details of the job cost, click the 3 dot menu and select “view”
This will open up a window with all details the vendor provided, as well as display any files they might have attached:

You can reject or approve any costs the vendor sends through the link. Approving communicates to them you accept the bid/invoice/change order. Rejecting communicates you do not accept. When you accept a job cost, if any other pending vendors are currently on the job, their work approval status will automatically be rejected:


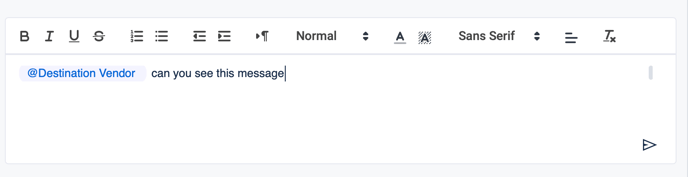
Messaging Vendors
Do you want to keep a central record of all messages sent to a vendor? You can send any vendor on a job a message via the notes tab of the job. To do so, “@” mention that vendor in the note you write:
This will make the message appear in the vendor’s unique link. If notifications are turned on, the vendor will also receive a notification about the message. From within the vendor link, they can message you back:

All these messages will be recorded in the job’s notes section.