In order to start using Fyxt’s Rent Payments system, you have to be onboarded by Fyxt Customer Success. Contact your representative when you are ready to start. Once in contact, you will have to complete the following process:
Onboarding Interviews and Discovery
Our client success team will need to verify your payment needs will be completely fulfilled by our system. In the initial meetings between us and your organization, we will need to learn the following:
-
How you structure your bank accounts and properties. For example, is each property its own legal entity with its own dedicated bank account? Or do multiple properties roll up under a legal entity and deposit their receivables to the same account?
-
For all bank accounts, will this account allow online rent payments to be made via credit card, ACH, or both?
-
What are the names and emails of the bank account controllers who will be in charge of collecting payments and providing information about your business’s bank accounts in our platform?
Initial Online Setup
Once we confirm how your organization is set up and our payments solution is right for you, we will email set up links to your desired controller of each bank account you need to set up. Those links will take each controller to a page like this:

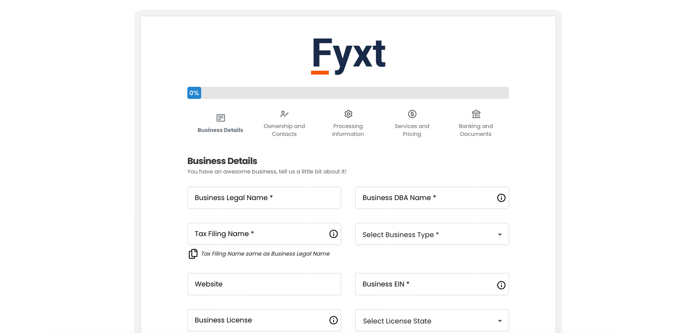
Here you’ll document the information about the business entity connected to the bank account you are setting up. Make sure to list the information about the business directly in charge of the account, not a parent organization. Next you’ll identify important members of the business:
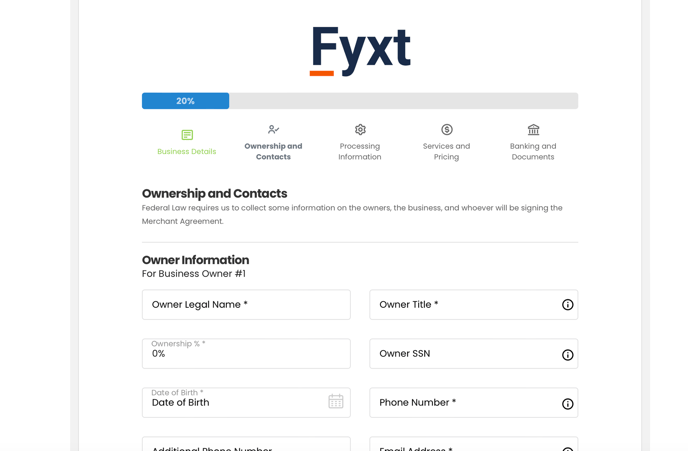

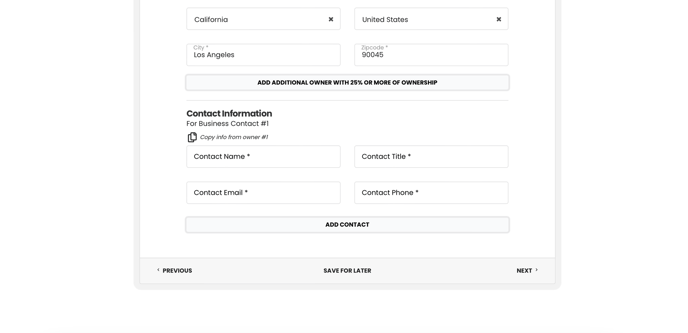
The controller will need to document the name, identity, and contact information of any business owners connected to the bank account they are setting up. If they themselves are not one of the owners, they should identify themselves as a contact at the bottom of the same page:
Next, the controller might see a page asking for information about how your business operates with payments:
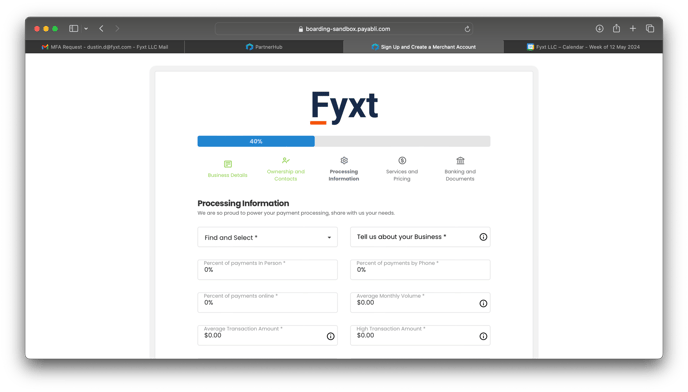

If presented with this page, the controller should give their best guesses to answer each question, such as your expected monthly volume of payments and average payment size. This information doesn’t have to be 100% accurate, but helps our team understand your account needs and provide support. Next, the controller will see a page verifying the payment types accepted for this bank account and what the pricing for these services will be:


If the controller sees any issues on this page, they should stop and immediately contact Fyxt Client Success. If everything looks good, the last step is entering the bank account information to fully connect it to the online system:

Enter both deposits account and withdrawal account information (even if they are the same account). Fyxt does not regularly support online refunds or outbound payments, but this step is necessary in case that service gets turned on in the future.
Waiting to be approved
Once a bank account is set up to receive payments, Fyxt’s payment processor, Payabli, will do some leg work and legal underwriting to get everything finalized. Fyxt or Payabli might reach out to your controller with requested signatures or additional needed documents. During this process, the bank account (now called a “Paypoint”) will go through several statuses:

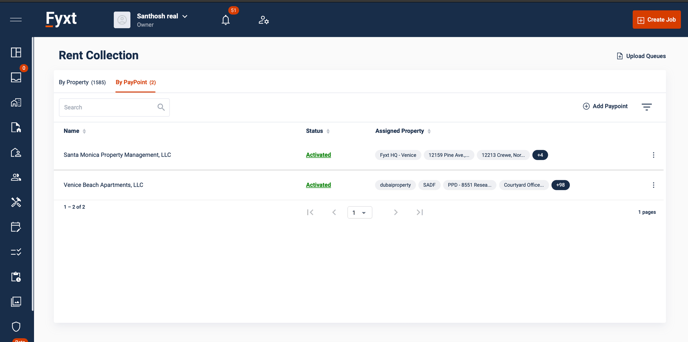
You can view the status of an individual paypoint from the Fyxt Rent Collection module:

Setting up a properties to collect online payments
In the Rent Collection Module, you’ll see a list of all your active properties:

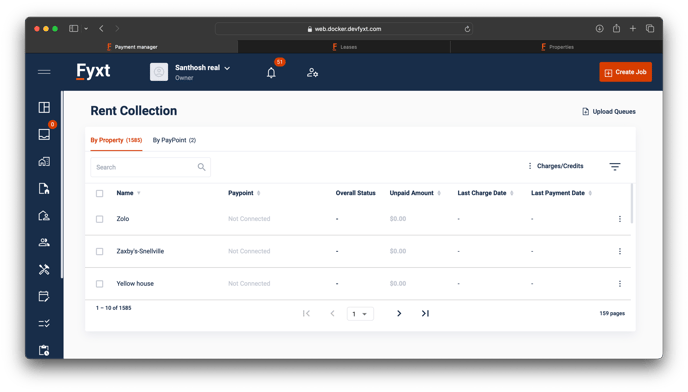
If they do not have a paypoint (one of your set up bank accounts), they cannot receive online rent payments. You can easily connect the desired paypoint to a specific property by clicking that property’s 3 dot menu button:
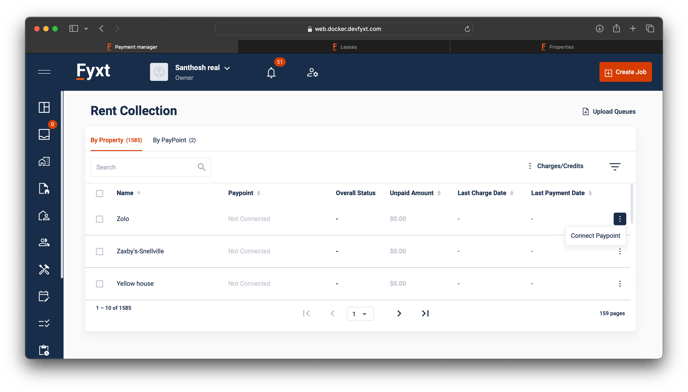

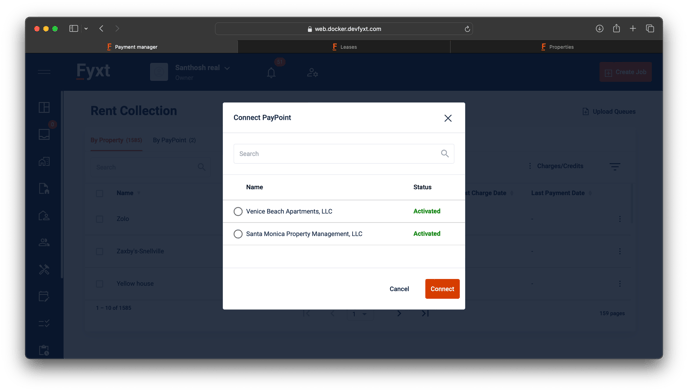
You can only choose one paypoint for each property. That is where online payments from your tenants will be deposited. The menu to make the assignment is shown here:

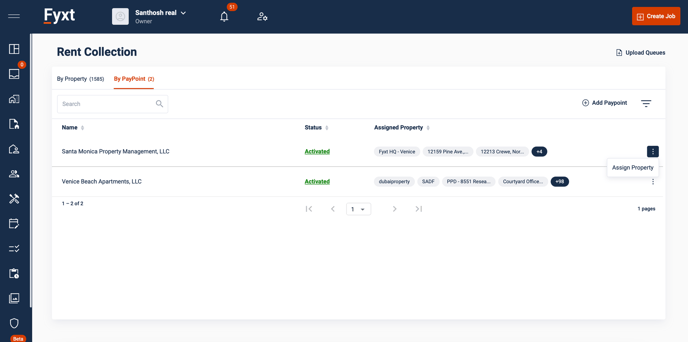
You can also search for and attach many properties to the same pay point by going to the paypoint list and clicking its own 3 dot menu button, as shown here:

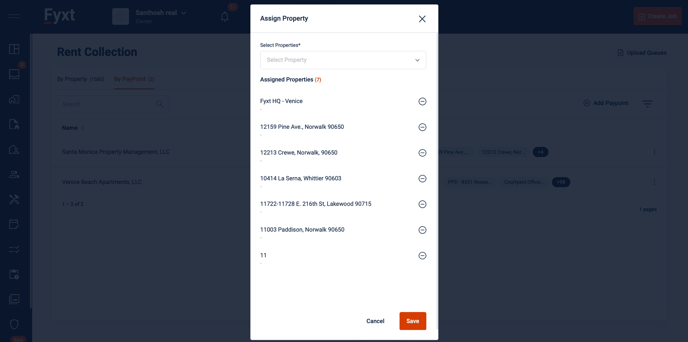
This allows you to assign many properties if they are all sharing the same bank account paypoint, as shown here:

Setting up leases to receive charges
When you have set up a property with a paypoint in the rent collection module, you have to get each lease within it ready to start receiving charges. Make sure every lease you want charges assigned to is already created in the Leases Module.
Next, you must click on a property that has one or more leases and a connected paypoint:
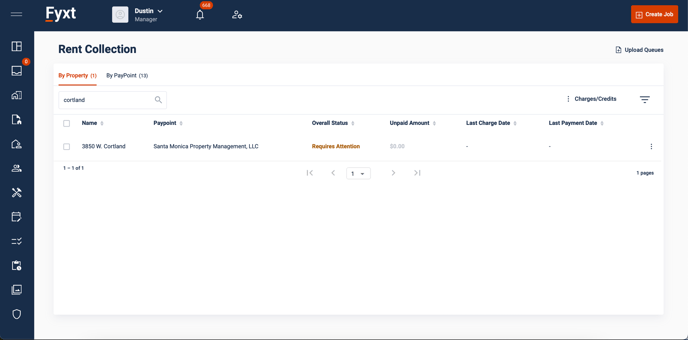

You’ll see that such a property will say “Requires Attention.” When you click on it to see the details, you’ll see a message explaining why:

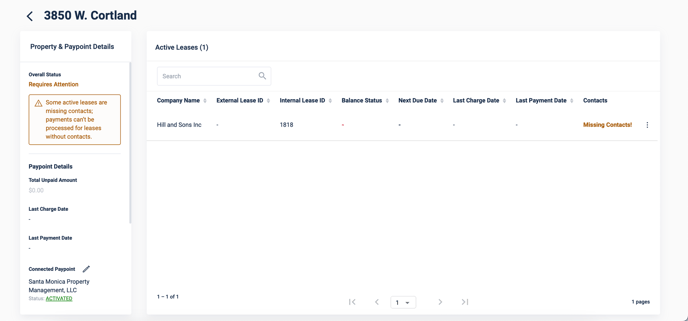
A lease needs a payment contact declared before you can post charges to it. Do this by clicking on the 3-dot menu and assigning 1 or more contacts:


NOTE: You can only select contacts belonging to the tenant company or assigned directly to the lease itself. Other contacts in your system will not be eligible to be chosen as payment contacts.
Once you get a payment contact for every lease, you'll see that you’re fully set up and the property is now “Operational.”

Posting charges to a lease
If you have an accounting integration with Fyxt, the following steps may not be necessary. Only the setup steps above are required if your accounting system is fully integrated to post charges in Fyxt’s payment system. But if you do not have such an integration, you can manually post charges following the process below.
1. Download the CSV Template
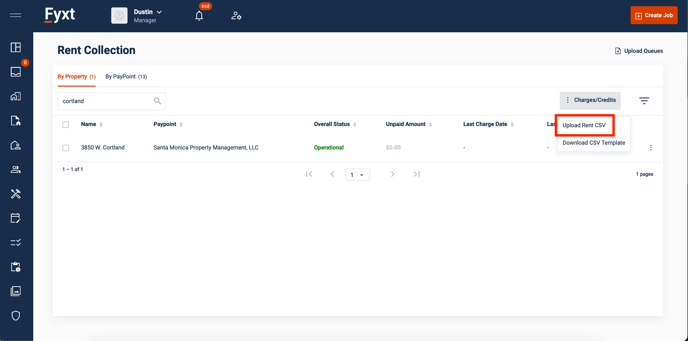
To post charges, you will need to create a spreadsheet. Go to the payments home page and click on the Charges/Credits menu. Then click “download CSV template.”


A CSV file will appear in your downloads, which will show you the proper way to format charges made to a lease:

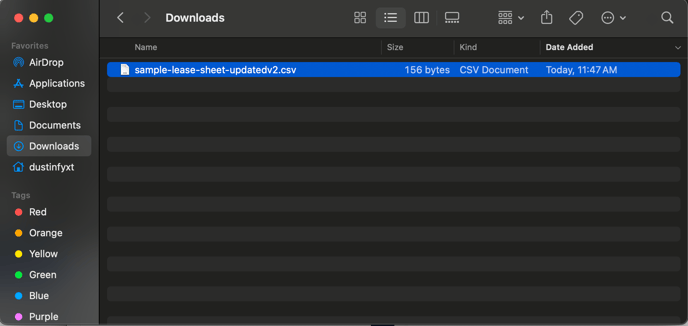
NOTE: If you use safari as your browser, the CSV may not download correctly. Try switching to a different browser and trying again.
2. Open the CSV in Excel, Numbers, or Google Sheets
When you open the CSV, you’ll see something like this:

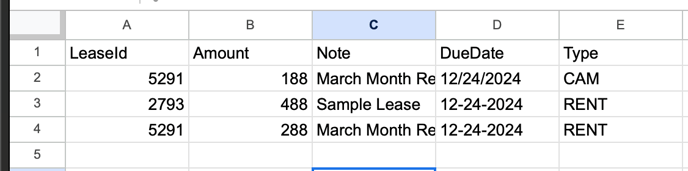
The first row is the titles of each column. Starting in the second row, you will enter all data for leases, amounts, and so on that you want to make charges for.
3. Make a new spreadsheet and enter your custom charges based on the template
Start entering data for the charges you want to post in a new spreadsheet, following the format showed in the CSV template.
Column 1: LeaseId
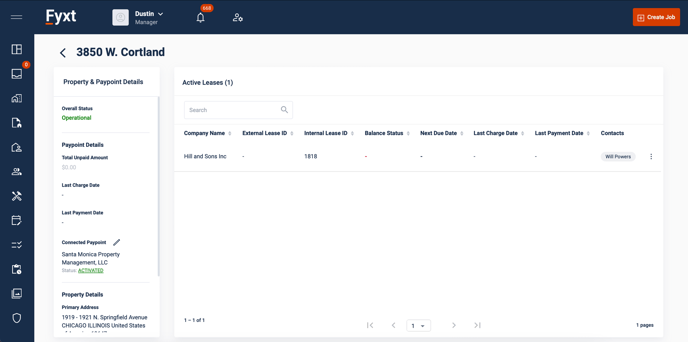
To post a charge to a lease, you need to fill the first cell in a row with the correct Lease ID. You can use any external ID you have loaded into Fyxt (such as a Yardi T-code), or you can look up Fyxt’s on internal lease ID by going to the property’s payment page:
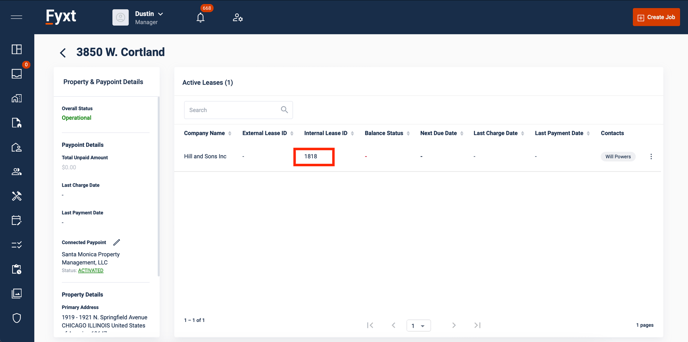
So if we are making a charges spreadsheet, it might look like this:


Column 2: Amount
For each charge you want to post, put in any dollar amount. “$” is not necessary but can be included if you want.


Column 3: Note
In the notes column, you can write whatever message you want to include. This message will be seen by the tenant, so it can be useful to communicate the reasons behind charges.


Column 4: Due Date
When you upload a charge CSV, tenants will be notified immediately and able to pay. It’s important to include a due date, however, to make sure they don’t wait too long to pay. Due dates are in MM-DD-YYYY format, and can also be accepted in MM/DD/YYYY format.


Column 5: Type
Every charge needs a type associated with it. This is so you can easily group different types of charges and whether or not they are paid. The accepted types you can put in this column are: rent, bill back, CAM, and other.


4. Make as many charges as you want!
You can have as many rows with charges as you want in your custom spreadsheet. The charges can be for leases in the same property, or even different properties.
Note: Tenants will be immediately notified of charges, as well as able to pay them, as soon as you upload your spreadsheet.
Also note: Each charge line will send the tenant a separate invoice, rather than a combined invoice.
5. Save your custom spreadsheet as a CSV

In order to upload your spreadsheet of charges in Fyxt, you’ll have to turn them back into a CSV instead of whatever file format the program you are using releases on.
6. Upload the CSV
Go back to the payments home page and click “Upload Rent CSV”

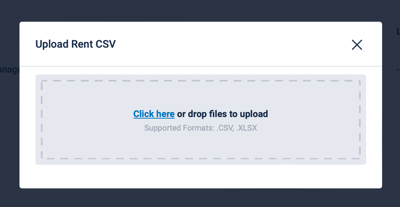
Drag and drop your custom CSV into the file menu shown:

All charges in the CSV will now be applied!
7. Check the upload
If you formatted everything correctly in the CSV, the upload will begin and everything will be smooth. To make sure things went correctly, go to the upload queue menu to check your progress:


Click on the most recent row to see the details:


Everything looks good! If there had been an issues with the file, you would see errors here instead.
Tracking Status of Charges
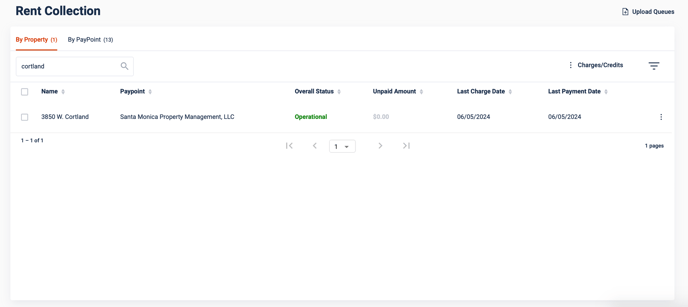
When looking at the home page of payments, you’ll see an overall balance for each property:
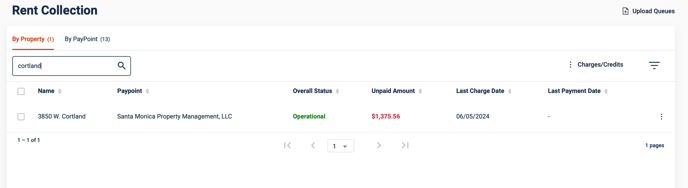

You’ll also see the last date you posted charges to any leases in this property, as well as the last date any tenants made a payment. You can click into a property to see more details about unpaid charges.
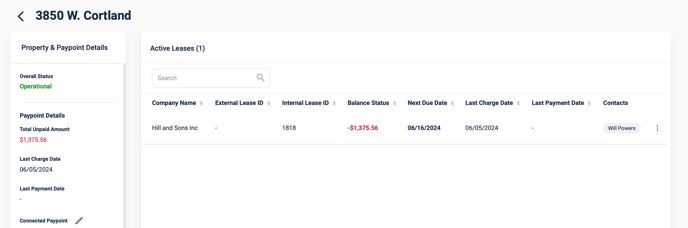

Inside the property, each lease’s individual balance will be broken out. You can also click into the lease itself to see more details

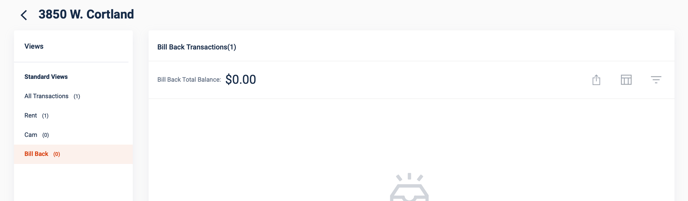
You see here you can see all charges and payments for this lease, and also see subdivided balances based upon specific charge types by clicking on them on the left panel.

When a Tenant Pays
Balances will update as tenants make payments. These changes will be reflected at all levels
Property Level

The balance total here will only be the unpaid amount. If all charges have been paid, it will show $0.00
Lease Level
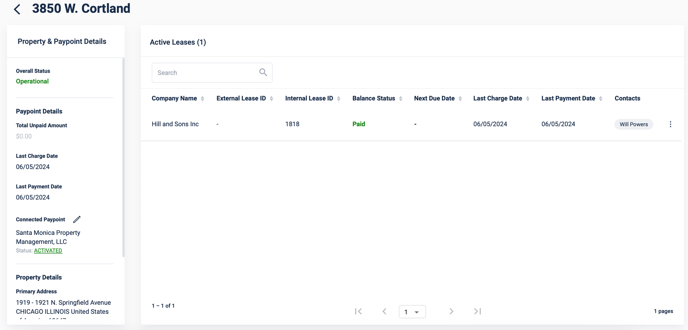

Leases will also display a balance of only the unpaid amounts, and if all is paid, it will show “Paid.”
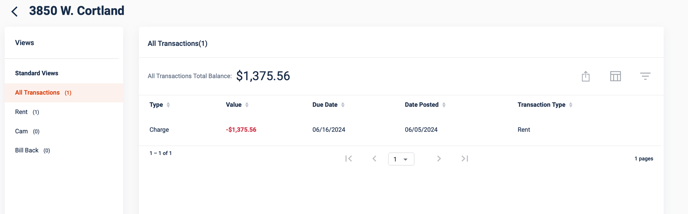
Ledger Level

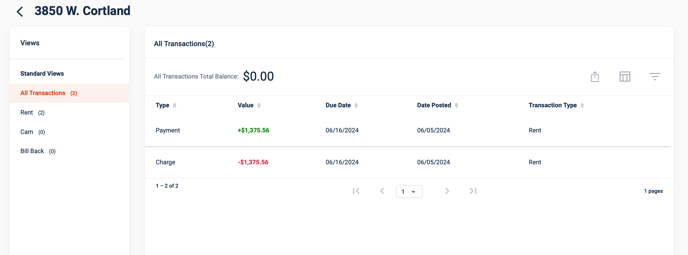
Inside the lease, the All Transactions ledger will show the cumulation of all charges and payments. The individual charge type views will likewise update.
What the Tenant Sees
As soon as you post a charge to a tenants lease, they will receive an email about the charge:
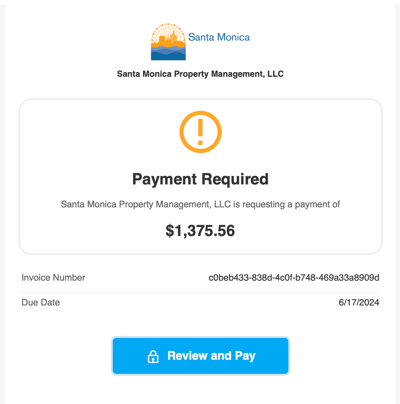
 They see a due date and a button where they can immediately pay. If they click the button, they are taken to the following page:
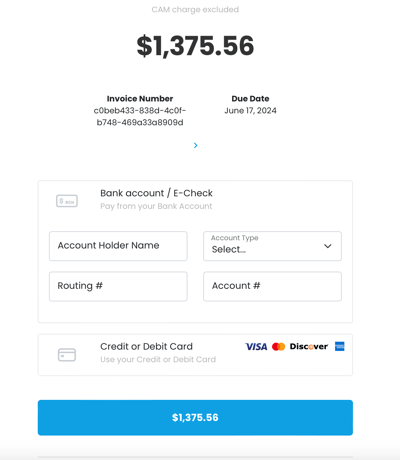

Information about the invoice is shown, as well as any note you put in the charge. They then can enter their credit card information or bank account information to pay. They might have to complete a captcha to finish paying and verify they are human:
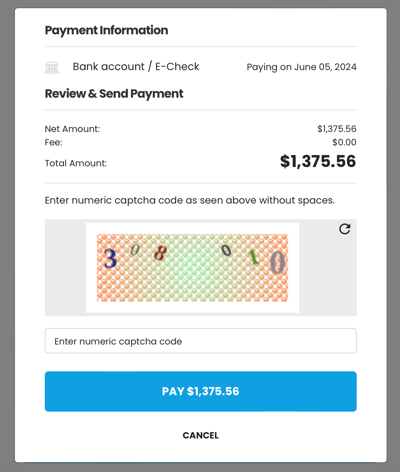

Then they will see a confirmation page:


The original email with the charge will always link back to this payment confirmation page once a payment has been processed.