Fyxt File Manager
This tutorial walks through The Fyxt File Manager. Your new bridge between operations and file retrieval.
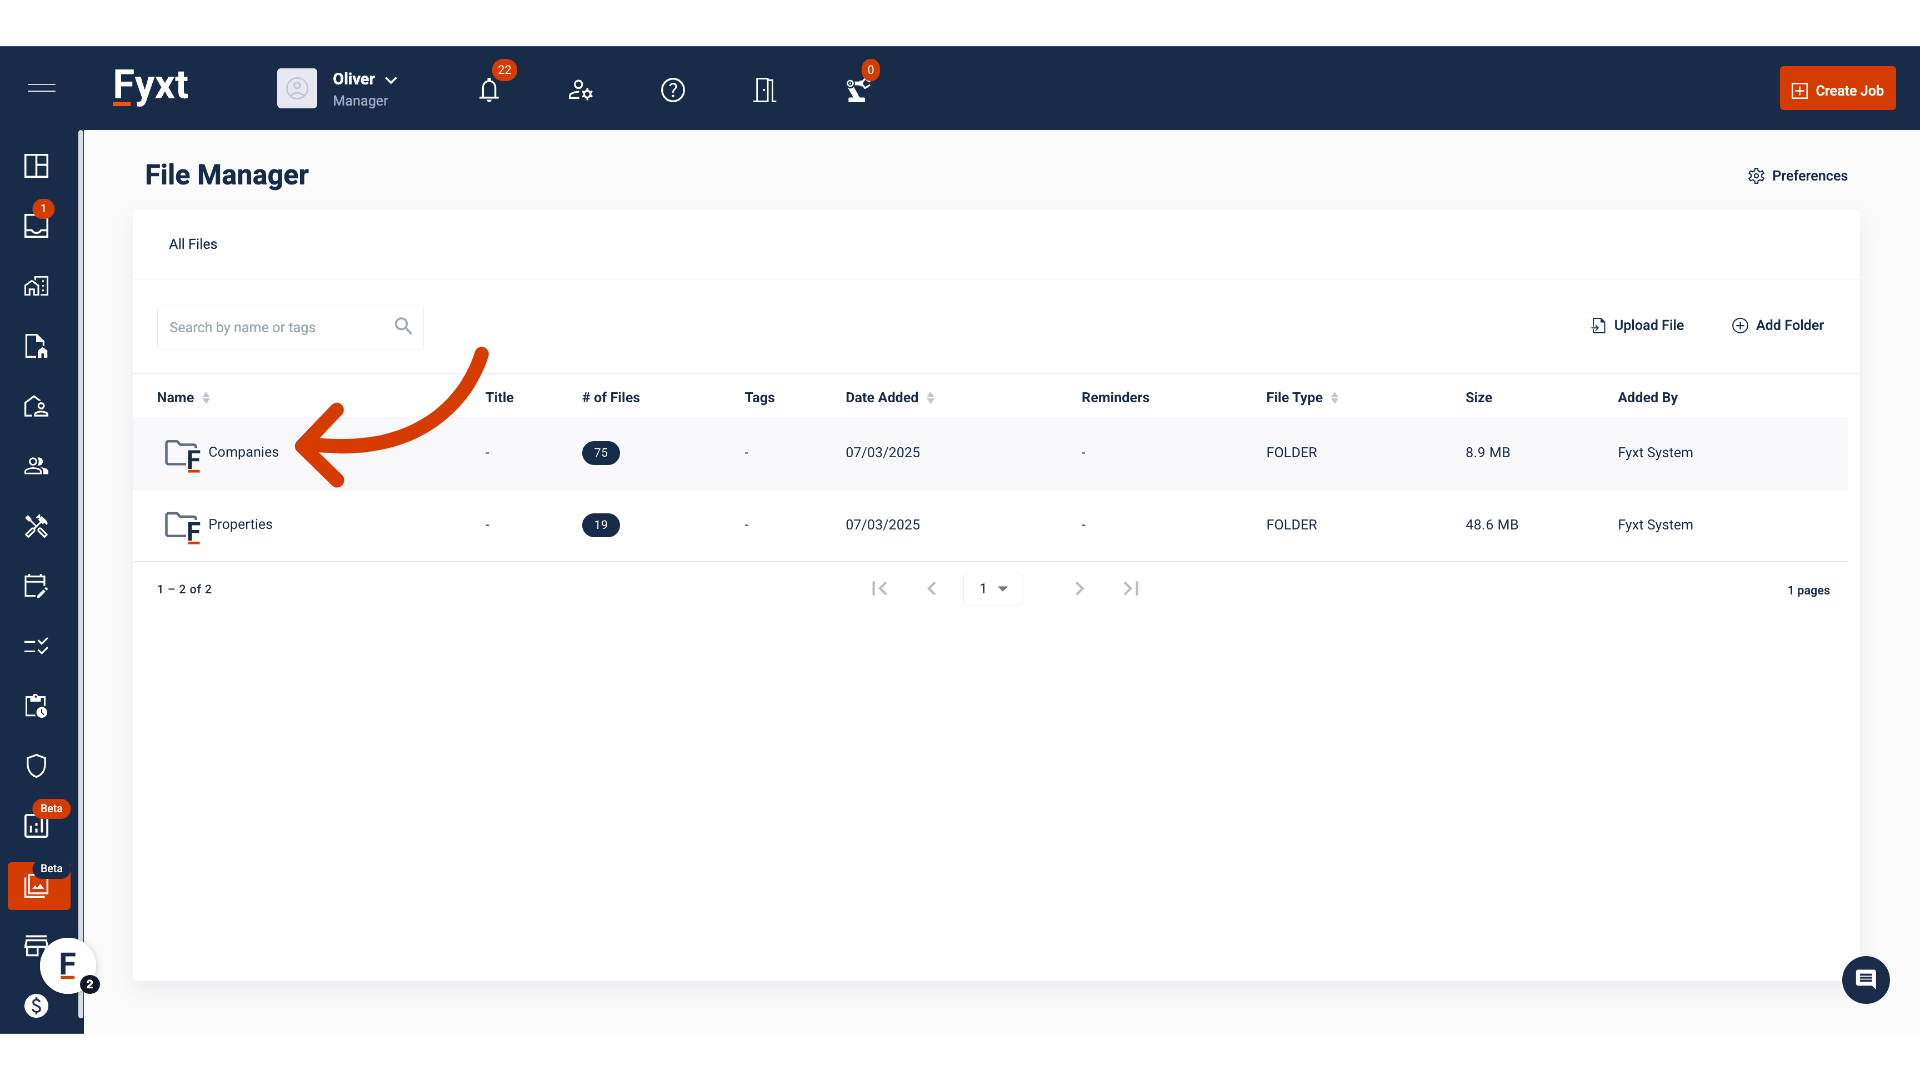
1. Navigate to the "File Manager"
As files are submitted they are stored and automatically mapped within a flexible and intuitive folder structure ensuring your ease of access on demand. While you are able to customize your own folder structure, Fyxt's default structure begins with Companies and Properties.

2. Understanding the Fyxt Folder Structure
The File Manager organizes documents in a structure that mirrors the modules in Fyxt to support intuitive file retrievals. The current and growing structure includes Companies and Properties.

3. Viewing Company Files
Select the Companies folder to manage company-specific documents.
4. Selecting a Company
Selecting the Companies folder will display a list of every Company under your account. Next select the Company of interest to view related files.

5. Company Folder Structure
Within a selected Company, you will find default folders for COI, Other and Warranty. These are the same folders you will notice when accessing the File tab of the selected Company. Let's look at this Company's COI folder.

6. Selecting a COI of Interest
A single Company can hold multiple COI's. When entering the COI folder, we next select the specific COI of interest. In this case, there is only one.

7. Viewing Your File
Once selecting the COI of interest, all related files of the COI will display allowing you to view, download, set reminders, and more. Breadcrumb navigation in the table header allow for quickly returning to desired folders. In this case, let's navigate to All Files to view Properties.

8. Viewing Property Files
Select the Properties row to manage property-specific documents.

9. Selecting a Property
Selecting the Properties folder will display a list of every Property under your account. Select the Property of interest to view related files.

10. Property Folder Structure
Within a selected Property, you will find default folders for Jobs and Leases. Like earlier, these folders will store all files related to all Jobs and Leases under the selected Property. Let's select Jobs.

11. Selecting a Job
The Jobs folder will store every Job created under the selected Property.

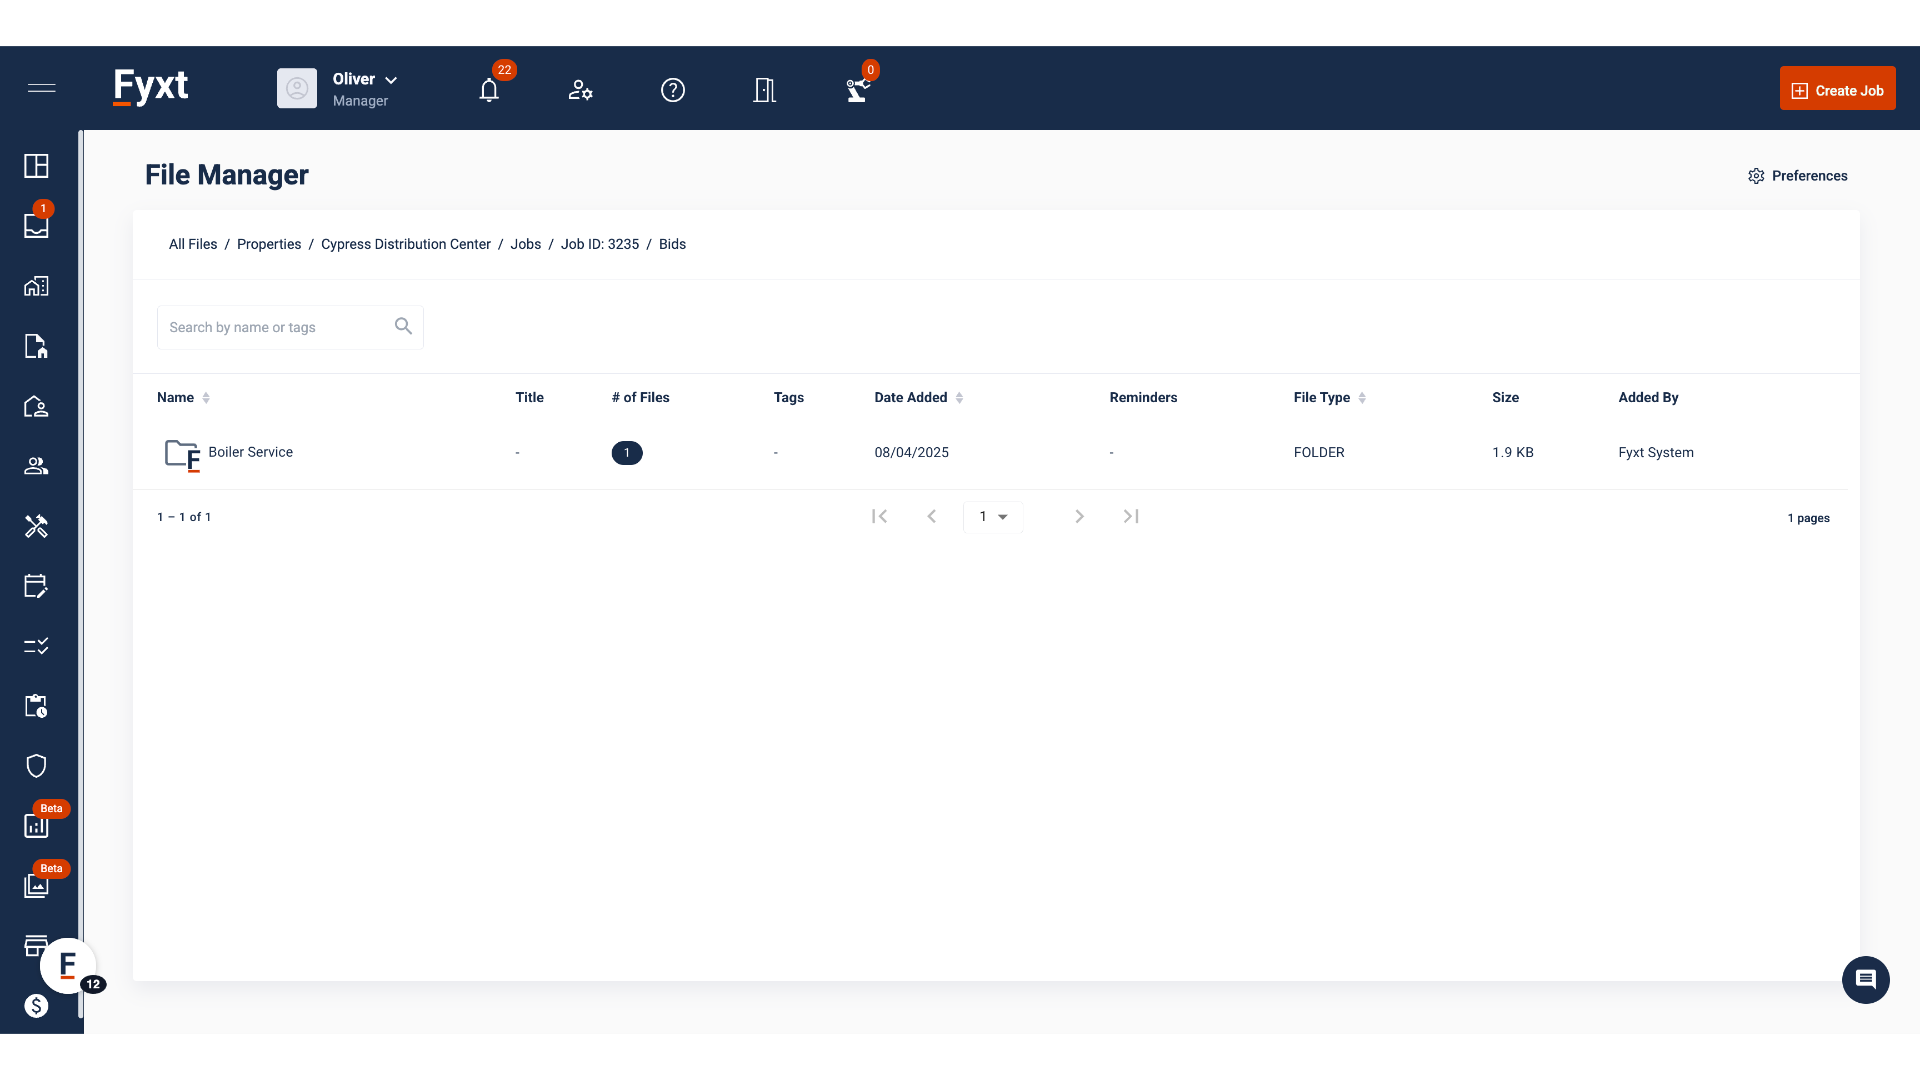
12. Jobs Folder Structure
Within a selected Job, you will find several folders organizing files in this Job. These folders exist so that as files are added to Jobs, they are automatically stored for intuitive retrieval. Let's view the submitted Bid for this Job.

13. Viewing Bids
As we saw before in the Company COI folder, the multiple bids potentially submitted to a Job will all populate in their own folders, allowing you to select the bid of interest.
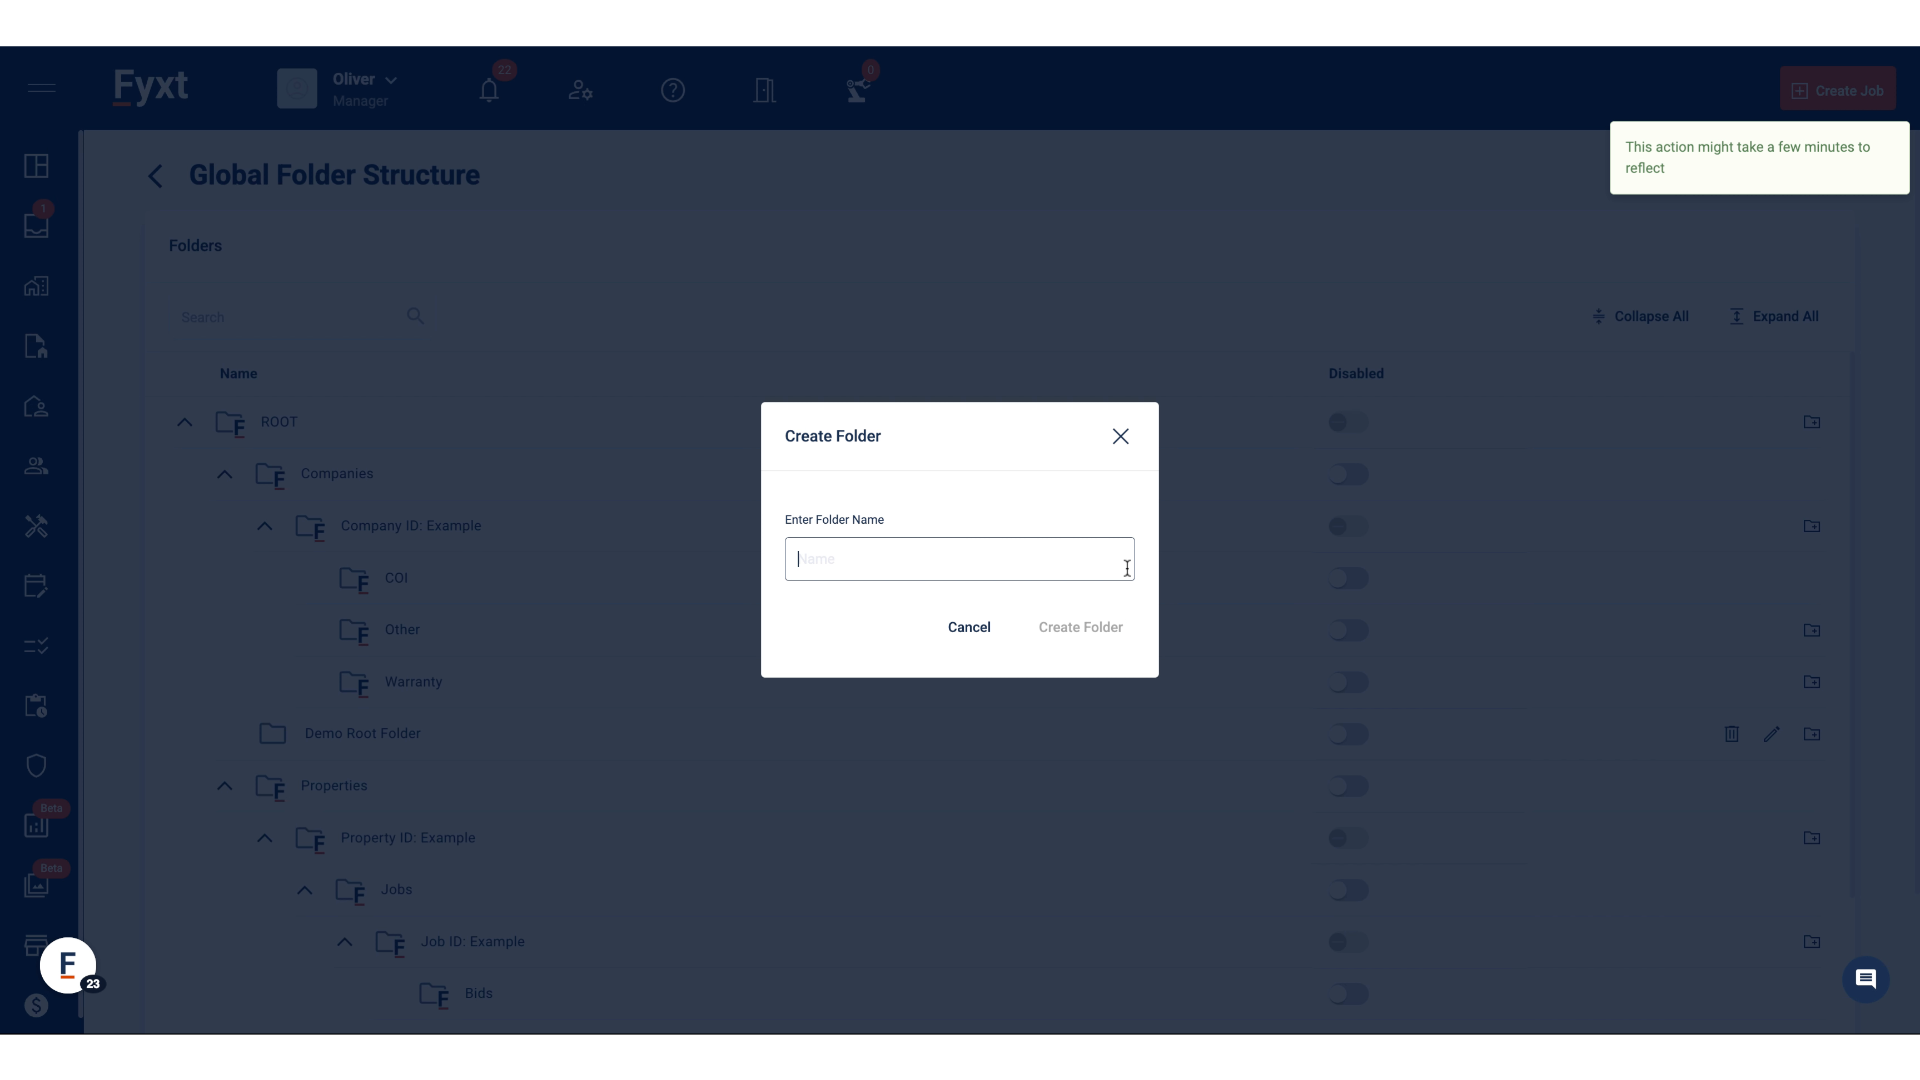
14. Global Folder Structure
With an understanding of the Fyxt default Folder Structure, let's now shift towards the flexible Global Folder Structure. As the name suggests, this is where you can customize your account-wide folder structure.

15. Creating Folders
To create a new folder, select the Create Folder icon on the right. Your created folder will be hosted under the selected folder.

16. Custom Folder Structure
For example, let's say we're interested in collecting Tenant sales reports to evaluate a Tenant's financial strength. Begin by clicking the Create Folder icon.

17. Fill "Quarterly Sales Report"
Enter 'Quarterly Sales Report' to label your folder and click Create Folder. Now, every Company record in Fyxt will have a default folder for Quarterly Sales Report.
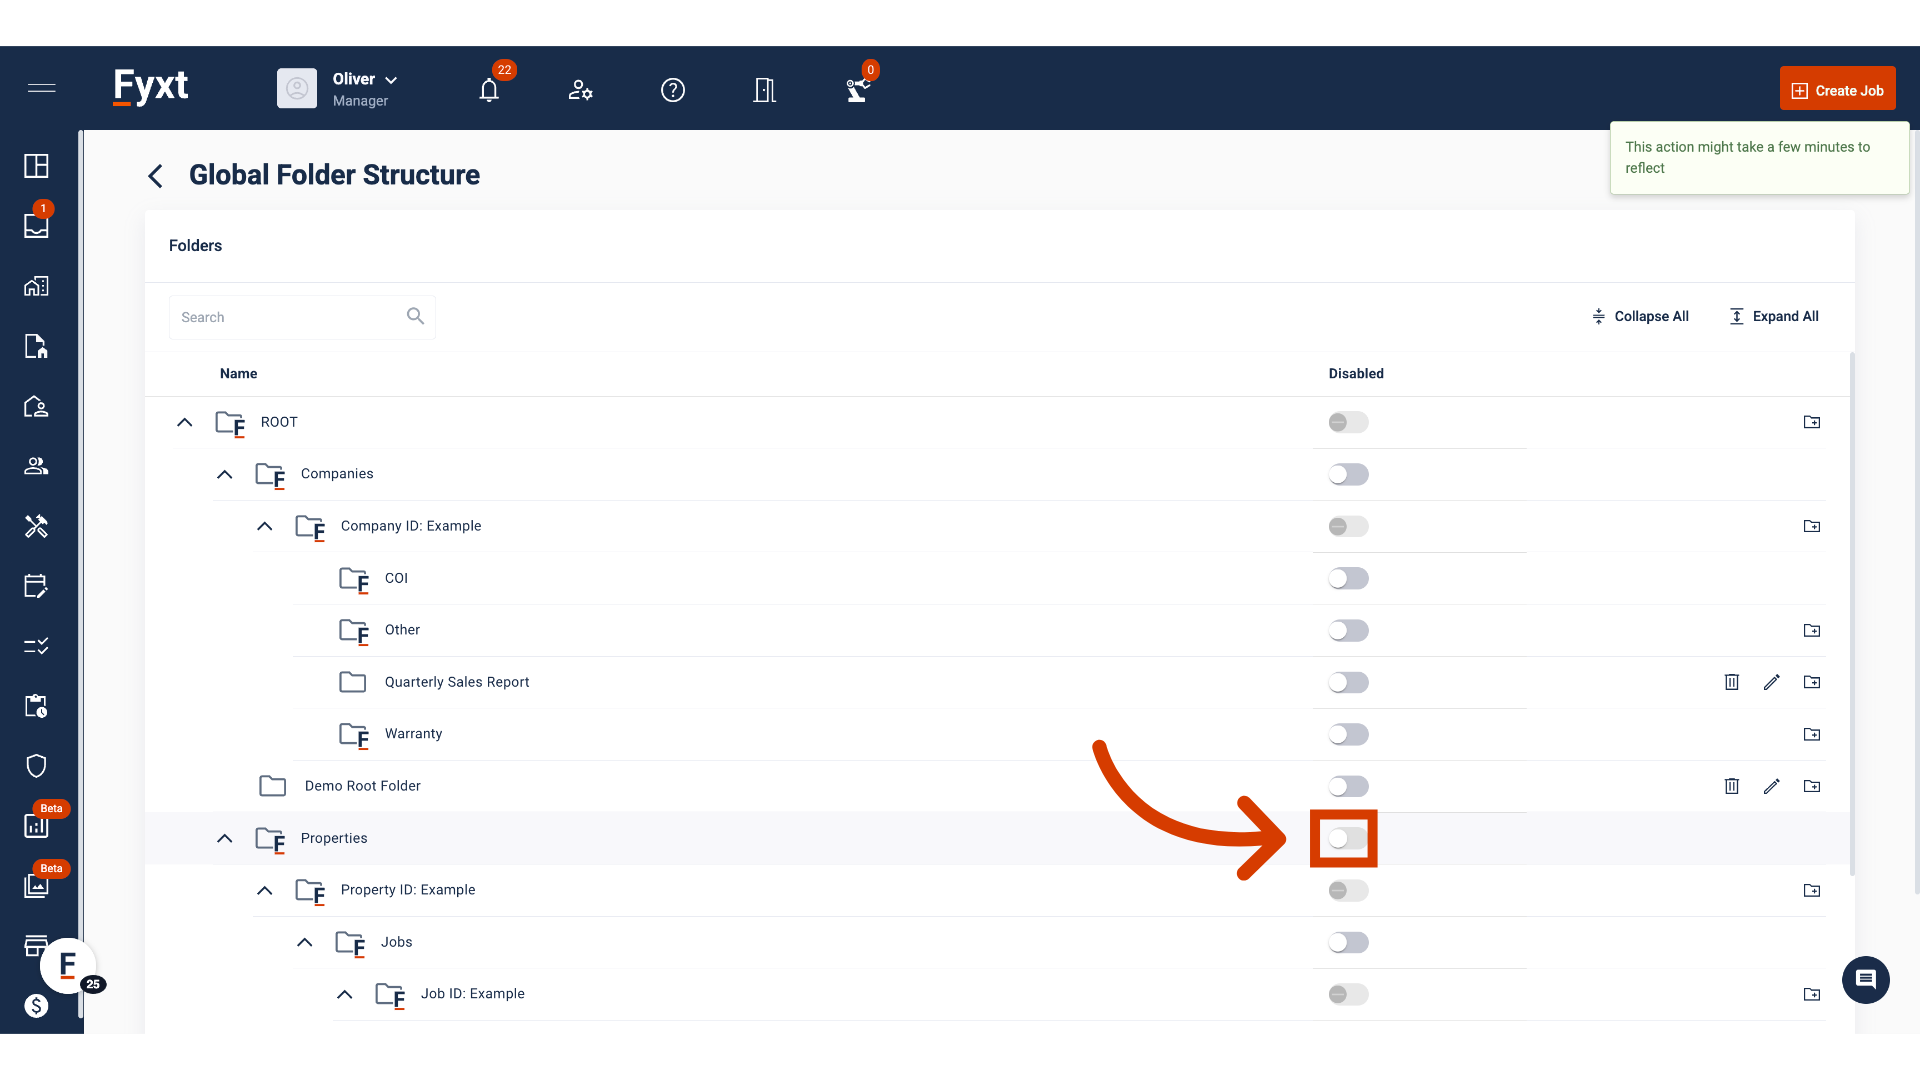
18. Disabling Folders
Lastly, should you wish to Disable or hide folders, selecting the toggle to Disable will hide the Disabled folder in all locations across the account. Disabled folders are simply hidden from view but remain in the archive, so no data is ever lost. To bring the folder back, simply enable the toggle and all of your files are back at your fingertips.
This guide walked you through navigating the File Manager, managing company and project files, creating folders, and organizing documents effectively within the Fyxt platform. Thanks for watching